If you love traditional Italian holiday treats, these Mostaccioli Cookies are a must bake. These soft spiced cookies are flavored with citrus zest, warm spices, and vanilla, then coated in a smooth chocolate glaze that gives them their signature finish. They have a tender texture, a rich aroma, and a nostalgic flavor that makes them perfect for holiday cookie platters, family gatherings, or simply enjoying with a hot cup of coffee.
Ingredients
For the Cookie Dough
- 3 cups All Purpose Flour
- 1-1/4 cups Granulated Sugar
- 1/2 cup Warm Water
- 1 tsp Baking Powder
- 1/2 tsp Baking Soda
- 1/4 tsp Ground Cinnamon
- 1/4 tsp Ground Cloves
- 1/4 tsp Ground Nutmeg
- 1 Packet Italian Vanilla or 1 tsp Vanilla Extract
- Zest and Juice of One Orange
- Zest and Juice of 1/2 Lemon
For the Chocolate Coating
- 2 cups Semisweet Chocolate Chips
- 2 tsp Vegetable Oil
How to Make Mostaccioli Cookies
Step 1: Prepare the Oven and Baking Sheets
Start by preheating your oven to 350 degrees Fahrenheit. Allow the oven to fully heat before baking to ensure the cookies cook evenly.
Line baking sheets with parchment paper. The parchment prevents sticking and makes cleanup much easier. Having your baking sheets prepared before shaping the cookies will streamline the entire process.
Step 2: Combine the Dry Ingredients
In the bowl of a stand mixer fitted with a paddle attachment, add the all purpose flour, granulated sugar, baking powder, baking soda, ground cinnamon, ground cloves, and ground nutmeg.
Mix the dry ingredients briefly to distribute the spices and leavening agents evenly throughout the flour. This step helps ensure every cookie has the same balanced flavor and texture.
The combination of cinnamon, cloves, and nutmeg creates the classic warm spice profile that makes Mostaccioli Cookies so distinctive.
Step 3: Add the Citrus and Vanilla
Add the orange zest, orange juice, lemon zest, lemon juice, vanilla, and warm water directly into the bowl.
The citrus zest plays an important role in the overall flavor. Orange provides sweetness and brightness, while lemon adds a subtle freshness that balances the richness of the chocolate coating later on.
The vanilla adds warmth and depth, helping all the flavors come together beautifully.
Step 4: Mix the Dough Until Smooth
Turn the mixer to medium speed and mix everything together for about 3 minutes.
At first, the mixture may seem rough or slightly dry, but continue mixing. The ingredients will gradually come together into a smooth dough.
The finished dough should feel soft and pliable without being sticky. Proper mixing helps develop a uniform texture and evenly distributes the spices and citrus throughout the dough.
Once the dough looks smooth and cohesive, stop mixing.
Step 5: Chill the Dough
Remove the dough from the mixer bowl and wrap it tightly in plastic wrap.
Place the wrapped dough in the refrigerator for about 30 minutes.
Chilling the dough serves several purposes. It allows the flour to fully hydrate, makes the dough easier to roll out, and helps prevent excessive spreading during baking.
While the dough chills, you can prepare your work surface and gather the tools needed for shaping.
Step 6: Roll Out the Dough
Lightly flour your work surface and place the chilled dough on top.
Using a rolling pin, roll the dough to approximately 1/3 inch thickness.
Try to maintain an even thickness throughout. Uniform thickness ensures all of the cookies bake at the same rate and develop a consistent texture.
If the dough begins sticking, lightly dust the surface or rolling pin with a bit more flour.
Step 7: Cut the Traditional Diamond Shapes
Using a sharp knife or pizza cutter, cut the dough into 2 inch strips on a diagonal.
Next, cut across the strips diagonally in the opposite direction to create the traditional diamond shaped cookies.
These signature diamond shapes are one of the defining characteristics of Mostaccioli Cookies.
Continue cutting until all the dough has been used.
Gather any scraps, gently reroll them, and cut additional cookies until no dough remains.
Step 8: Arrange the Cookies on Baking Sheets
Transfer the cut cookies to your prepared parchment lined baking sheets.
Leave a little space between each cookie, although they do not spread dramatically while baking.
Arrange them in neat rows so they bake evenly and are easy to remove once finished.
Step 9: Brush the Tops with Water
Using a pastry brush, lightly brush the tops of the cookies with water.
This simple step helps create a smooth surface and encourages an attractive finish during baking.
A light coating is all that is needed. Avoid saturating the dough.
Step 10: Bake Until Lightly Golden
Place the baking sheets in the preheated oven.
Bake the cookies for approximately 15 to 18 minutes, or until they are lightly golden.
The exact baking time may vary slightly depending on your oven, so begin checking them around the 15 minute mark.
The cookies should appear set and lightly colored without becoming overly dark.
Properly baked Mostaccioli Cookies should remain tender inside while holding their shape beautifully.
Step 11: Cool Completely
Remove the cookies from the oven and allow them to sit on the baking sheet briefly.
Transfer them to a wire rack and let them cool completely.
Cooling is an important step because warm cookies can cause the chocolate coating to become thin and messy.
Allowing them to cool fully ensures a smooth, even chocolate finish later.
Step 12: Prepare the Chocolate Glaze
Add the semisweet chocolate chips and vegetable oil to a microwave safe bowl.
Microwave in 30 second intervals, stirring after each interval.
Continue heating until the chocolate is fully melted and silky smooth.
The vegetable oil helps create a glossy coating and improves the consistency for dipping.
Be careful not to overheat the chocolate. Gentle heating and frequent stirring produce the best results.
Step 13: Dip the Cookies in Chocolate
Once the chocolate is smooth, begin dipping the cooled cookies.
You can either coat the entire cookie or dip only one side, depending on your preference.
Allow any excess chocolate to drip back into the bowl before placing the cookie on a wire rack.
The chocolate coating adds richness and creates the classic appearance associated with these traditional cookies.
Continue until all the cookies have been coated.
Step 14: Set the Chocolate
Place the chocolate coated cookies in the refrigerator until the chocolate has fully set.
This usually takes a short amount of time and helps create a firm, clean finish.
Once set, the cookies can be transferred to a serving platter or storage container.
Step 15: Serve and Store
Serve the cookies once the chocolate has hardened completely.
These cookies can be stored at room temperature after the chocolate sets.
Their flavor often becomes even better after a day as the spices and citrus continue to develop together.
They are wonderful for holiday dessert trays, cookie exchanges, and gifting during the festive season.
Tips for Perfect Mostaccioli Cookies
- Chill the dough thoroughly for easier rolling and cutting.
- Roll the dough evenly to ensure uniform baking.
- Use fresh citrus zest for the brightest flavor.
- Stir the chocolate frequently while melting to prevent scorching.
- Allow the cookies to cool completely before dipping.
- Line baking sheets with parchment paper for easy cleanup.
- Use a wire rack when glazing for the neatest finish.
- Store in an airtight container to maintain freshness.
- Let the cookies sit overnight for even deeper flavor development.
- Freeze finished cookies if preparing ahead for holidays.
Essential Equipment Guide
- Stand Mixer with Paddle Attachment
- Mixing Bowl
- Plastic Wrap
- Rolling Pin
- Pizza Cutter or Sharp Knife
- Baking Sheets
- Parchment Paper
- Pastry Brush
- Wire Cooling Rack
- Microwave Safe Bowl
- Measuring Cups and Measuring Spoons
- Citrus Zester
Pairings
- Hot coffee
- Espresso
- Cappuccino
- Latte
- Hot chocolate
- Black tea
- Orange spice tea
- Vanilla ice cream
- Holiday dessert platters
- Fresh fruit trays
Variations
- Add a pinch of allspice for extra warmth.
- Dip only half of each cookie in chocolate for a decorative look.
- Top the chocolate coating with festive sprinkles.
- Use dark chocolate instead of semisweet chocolate.
- Add finely chopped toasted nuts over the chocolate coating.
- Include a little orange extract for enhanced citrus flavor.
- Drizzle white chocolate over the finished cookies.
- Make smaller bite sized versions for holiday cookie trays.
Prep & Cook Time
- Prep Time: 30 minutes
- Cook Time: 20 minutes
Servings
- Makes a few dozen cookies, depending on size
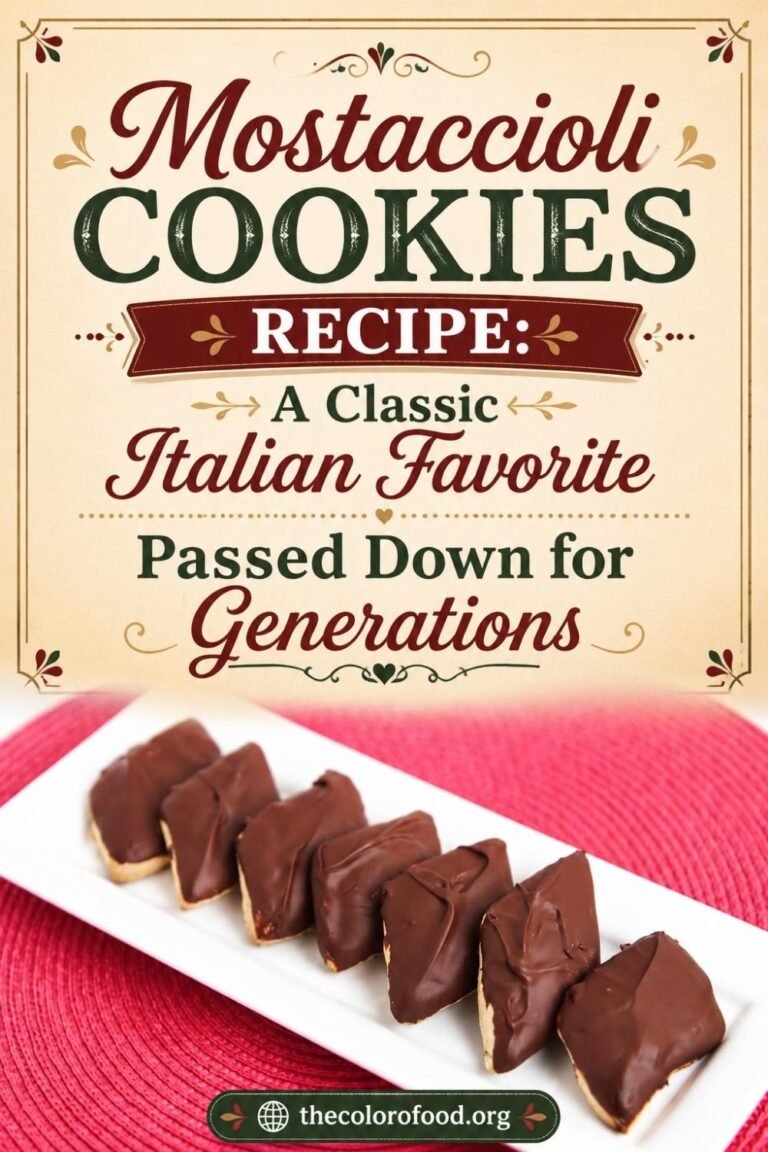
Mostaccioli Cookies Recipe: A Classic Italian Favorite Passed Down for Generations
If you love traditional Italian holiday treats, these Mostaccioli Cookies are a must bake. These soft spiced cookies are flavored with citrus zest, warm spices, and vanilla, then coated in a smooth chocolate glaze that gives them their signature finish. They have a tender texture, a rich aroma, and a nostalgic flavor that makes them perfect for holiday cookie platters, family gatherings, or simply enjoying with a hot cup of coffee.
- Total Time: 50 Mins
- Yield: 2 dozen
Ingredients
For the Cookie Dough
- 3 cups All Purpose Flour
- 1-1/4 cups Granulated Sugar
- 1/2 cup Warm Water
- 1 tsp Baking Powder
- 1/2 tsp Baking Soda
- 1/4 tsp Ground Cinnamon
- 1/4 tsp Ground Cloves
- 1/4 tsp Ground Nutmeg
- 1 Packet Italian Vanilla or 1 tsp Vanilla Extract
- Zest and Juice of One Orange
- Zest and Juice of 1/2 Lemon
For the Chocolate Coating
- 2 cups Semisweet Chocolate Chips
- 2 tsp Vegetable Oil
Instructions
Start by preheating your oven to 350 degrees Fahrenheit. Allow the oven to fully heat before baking to ensure the cookies cook evenly.
Line baking sheets with parchment paper. The parchment prevents sticking and makes cleanup much easier. Having your baking sheets prepared before shaping the cookies will streamline the entire process.
Step 2: Combine the Dry IngredientsIn the bowl of a stand mixer fitted with a paddle attachment, add the all purpose flour, granulated sugar, baking powder, baking soda, ground cinnamon, ground cloves, and ground nutmeg.
Mix the dry ingredients briefly to distribute the spices and leavening agents evenly throughout the flour. This step helps ensure every cookie has the same balanced flavor and texture.
The combination of cinnamon, cloves, and nutmeg creates the classic warm spice profile that makes Mostaccioli Cookies so distinctive.
Step 3: Add the Citrus and VanillaAdd the orange zest, orange juice, lemon zest, lemon juice, vanilla, and warm water directly into the bowl.
The citrus zest plays an important role in the overall flavor. Orange provides sweetness and brightness, while lemon adds a subtle freshness that balances the richness of the chocolate coating later on.
The vanilla adds warmth and depth, helping all the flavors come together beautifully.
Step 4: Mix the Dough Until SmoothTurn the mixer to medium speed and mix everything together for about 3 minutes.
At first, the mixture may seem rough or slightly dry, but continue mixing. The ingredients will gradually come together into a smooth dough.
The finished dough should feel soft and pliable without being sticky. Proper mixing helps develop a uniform texture and evenly distributes the spices and citrus throughout the dough.
Once the dough looks smooth and cohesive, stop mixing.
Step 5: Chill the DoughRemove the dough from the mixer bowl and wrap it tightly in plastic wrap.
Place the wrapped dough in the refrigerator for about 30 minutes.
Chilling the dough serves several purposes. It allows the flour to fully hydrate, makes the dough easier to roll out, and helps prevent excessive spreading during baking.
While the dough chills, you can prepare your work surface and gather the tools needed for shaping.
Step 6: Roll Out the DoughLightly flour your work surface and place the chilled dough on top.
Using a rolling pin, roll the dough to approximately 1/3 inch thickness.
Try to maintain an even thickness throughout. Uniform thickness ensures all of the cookies bake at the same rate and develop a consistent texture.
If the dough begins sticking, lightly dust the surface or rolling pin with a bit more flour.
Step 7: Cut the Traditional Diamond ShapesUsing a sharp knife or pizza cutter, cut the dough into 2 inch strips on a diagonal.
Next, cut across the strips diagonally in the opposite direction to create the traditional diamond shaped cookies.
These signature diamond shapes are one of the defining characteristics of Mostaccioli Cookies.
Continue cutting until all the dough has been used.
Gather any scraps, gently reroll them, and cut additional cookies until no dough remains.
Step 8: Arrange the Cookies on Baking SheetsTransfer the cut cookies to your prepared parchment lined baking sheets.
Leave a little space between each cookie, although they do not spread dramatically while baking.
Arrange them in neat rows so they bake evenly and are easy to remove once finished.
Step 9: Brush the Tops with WaterUsing a pastry brush, lightly brush the tops of the cookies with water.
This simple step helps create a smooth surface and encourages an attractive finish during baking.
A light coating is all that is needed. Avoid saturating the dough.
Step 10: Bake Until Lightly GoldenPlace the baking sheets in the preheated oven.
Bake the cookies for approximately 15 to 18 minutes, or until they are lightly golden.
The exact baking time may vary slightly depending on your oven, so begin checking them around the 15 minute mark.
The cookies should appear set and lightly colored without becoming overly dark.
Properly baked Mostaccioli Cookies should remain tender inside while holding their shape beautifully.
Step 11: Cool CompletelyRemove the cookies from the oven and allow them to sit on the baking sheet briefly.
Transfer them to a wire rack and let them cool completely.
Cooling is an important step because warm cookies can cause the chocolate coating to become thin and messy.
Allowing them to cool fully ensures a smooth, even chocolate finish later.
Step 12: Prepare the Chocolate GlazeAdd the semisweet chocolate chips and vegetable oil to a microwave safe bowl.
Microwave in 30 second intervals, stirring after each interval.
Continue heating until the chocolate is fully melted and silky smooth.
The vegetable oil helps create a glossy coating and improves the consistency for dipping.
Be careful not to overheat the chocolate. Gentle heating and frequent stirring produce the best results.
Step 13: Dip the Cookies in ChocolateOnce the chocolate is smooth, begin dipping the cooled cookies.
You can either coat the entire cookie or dip only one side, depending on your preference.
Allow any excess chocolate to drip back into the bowl before placing the cookie on a wire rack.
The chocolate coating adds richness and creates the classic appearance associated with these traditional cookies.
Continue until all the cookies have been coated.
Step 14: Set the ChocolatePlace the chocolate coated cookies in the refrigerator until the chocolate has fully set.
This usually takes a short amount of time and helps create a firm, clean finish.
Once set, the cookies can be transferred to a serving platter or storage container.
Step 15: Serve and StoreServe the cookies once the chocolate has hardened completely.
These cookies can be stored at room temperature after the chocolate sets.
Their flavor often becomes even better after a day as the spices and citrus continue to develop together.
They are wonderful for holiday dessert trays, cookie exchanges, and gifting during the festive season.
- Prep Time: 30 Mins
- Cook Time: 20 mins