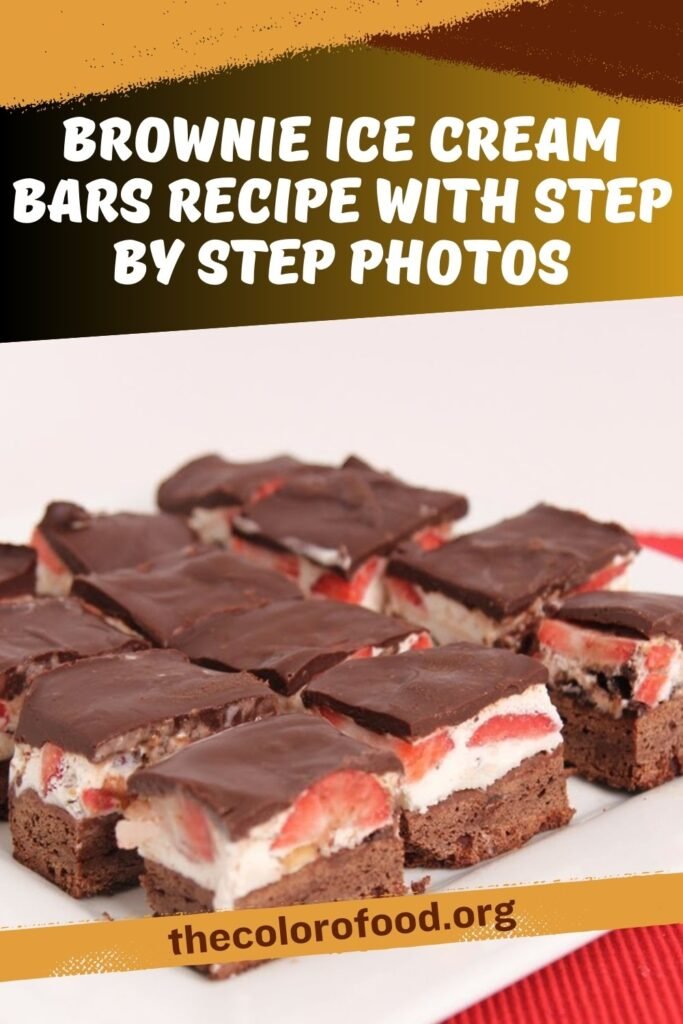
Brownie Ice Cream Bars combine a fudgy brownie base with creamy ice cream, fresh strawberries, and glossy chocolate ganache for an indulgent frozen treat. This no-bake layered dessert is perfect for summer gatherings, offering rich chocolate flavors balanced by tart fruit.
Ingredients
- 1/2 cup of Unsalted Butter, at room temperature
- 1 ½ cups of Bittersweet Chocolate, melted
- 1 Cup of Sugar
- 2 tsp of Vanilla Extract
- ¼ tsp of Salt
- 1 Tbsp Cocoa Powder
- 2 Large Eggs
- 2 Tbsp of warm Water
- 1 tsp of Instant Espresso Powder
- 2/3 Cup of All Purpose Flour
- 3 cups of Turtle Ice Cream (or your favorite ice cream)
- 1 ½ cups of Sliced Strawberries, optional
- 1 ¼ cup of Semisweet Chocolate pieces
- 2/3 cups of Heavy Cream
1. Essential Equipment Guide
- 9×9 inch square baking pan
- Parchment paper
- Large mixing bowl
- Whisk or electric mixer
- Small cup for espresso mixture
- Spatula
- Small saucepan
- Measuring cup or bowl for ganache
- Plastic wrap or aluminum foil
- Sharp knife
- Kitchen towel or paper towels for cleaning knife
Timing and Servings
- Prep Time: 15 minutes
- Cook Time: 30 minutes
- Servings: Makes about 18 squares
Step 1: Prepare the Pan and Preheat Oven
Start by preheating your oven to 350 degrees Fahrenheit. Take a 9×9 inch square baking pan and spray it lightly with non-stick cooking spray. This prevents sticking and ensures easy removal later. Line the bottom and sides of the pan with parchment paper, allowing it to overhang on two sides like handles for lifting the bars out once set. The parchment makes cleanup simple and keeps the brownie base intact during removal.
Step 2: Activate the Espresso Powder
In a small cup, combine 2 tablespoons of warm water with 1 teaspoon of instant espresso powder. Stir until the powder fully dissolves, creating a smooth liquid. This espresso mixture enhances the chocolate depth without overpowering the brownie flavor. Set it aside while you prepare the wet ingredients. The warmth helps the powder dissolve quickly, avoiding gritty bits in the batter.
Step 3: Cream Butter and Sugar
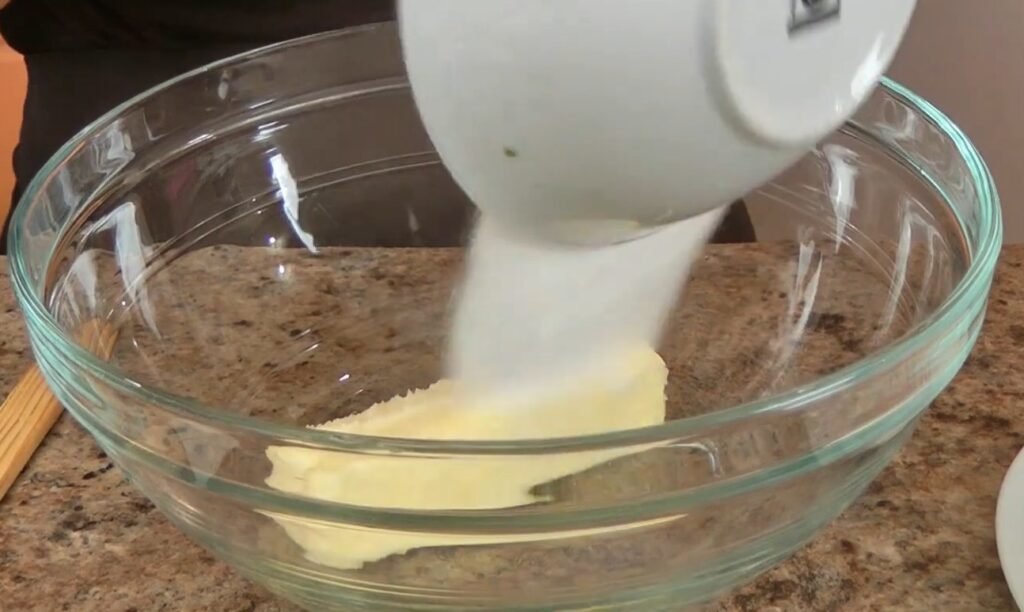
In a large mixing bowl, add 1/2 cup of unsalted butter at room temperature and 1 cup of sugar. Use a whisk or electric mixer to beat them together until the mixture becomes light, fluffy, and well combined. This creaming process incorporates air into the batter, contributing to a tender crumb in the brownie. Scrape down the sides of the bowl occasionally to ensure even mixing. Room temperature butter blends more easily than cold, preventing lumps.
Step 4: Add Eggs and Flavorings
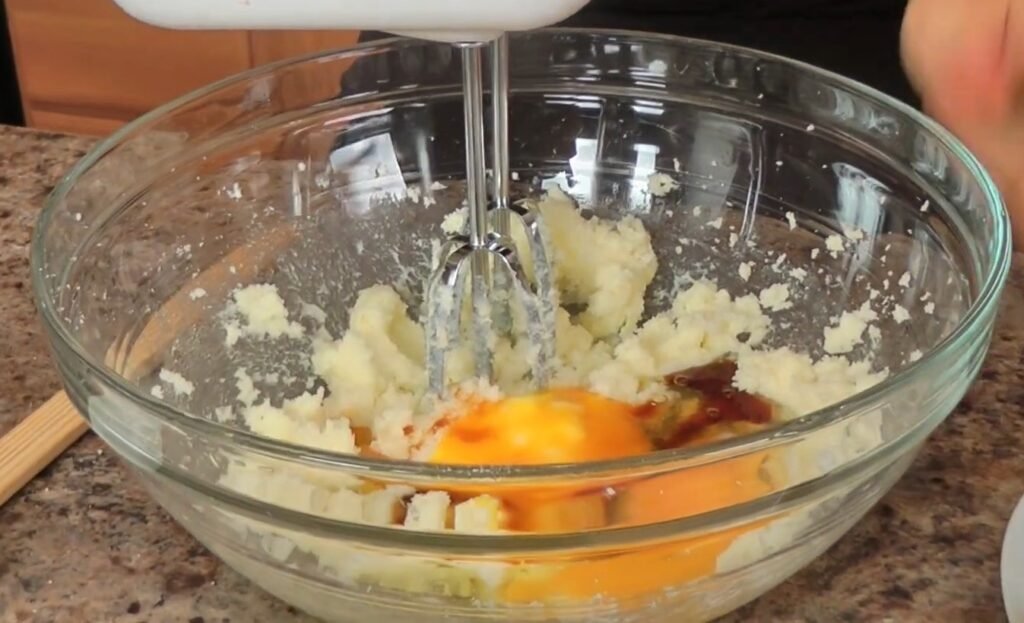
To the creamed butter and sugar, add 2 large eggs, 2 teaspoons of vanilla extract, and the prepared espresso mixture. Whisk vigorously until everything is fully incorporated and smooth. The eggs provide structure and moisture, while vanilla adds warmth and the espresso boosts chocolate intensity. Beat just until combined to avoid overworking the batter, which could make the brownies tough. If using a mixer, start on low speed to prevent splashing.
Step 5: Incorporate Melted Chocolate
Measure 1 ½ cups of bittersweet chocolate before melting, then melt it gently using a microwave in short bursts or a double boiler. Ensure it cools slightly before adding. Pour the cooled melted chocolate into the wet mixture and whisk until creamy and uniform. Cooling prevents the hot chocolate from cooking the eggs, which could result in scrambled bits. This step creates the rich, fudgy base characteristic of these bars.
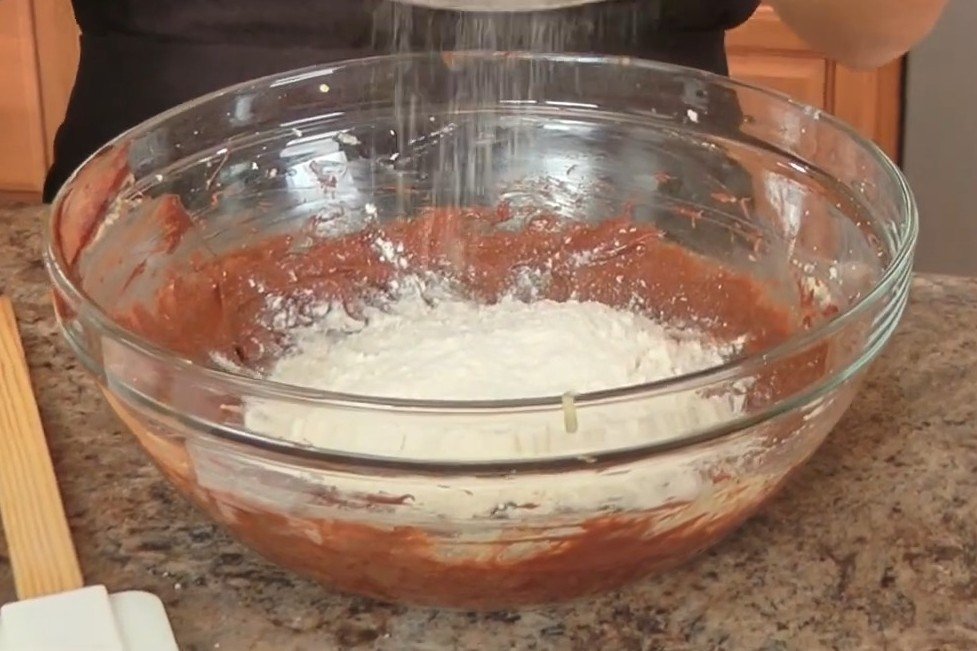
Step 6: Mix in Dry Ingredients
Sift or whisk together 2/3 cup all-purpose flour, 1 tablespoon cocoa powder, and ¼ teaspoon salt. Add these dry ingredients to the wet chocolate mixture. Gently fold them in with a spatula or whisk until just combined, with no visible flour streaks. Avoid overmixing to keep the brownies dense and chewy rather than cakey. The cocoa adds extra chocolate flavor, and salt balances the sweetness.
Step 7: Bake the Brownie Base
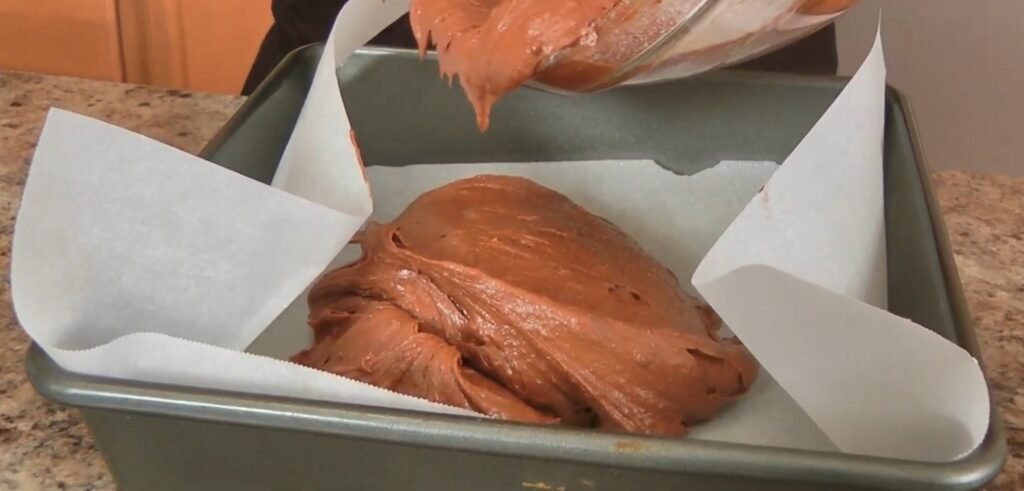
Pour the batter into the prepared 9×9 pan. Spread it evenly with a spatula to create a thin, uniform layer. Bake in the preheated 350-degree oven for about 25 to 30 minutes. Test doneness by inserting a toothpick into the center; it should come out with moist crumbs, not wet batter. The thinner layer in a 9×9 pan, rather than 8×8, accommodates the upcoming ice cream and ganache layers without being overly thick.
Step 8: Cool the Brownies Completely
Remove the pan from the oven and let the brownies cool completely in the pan on a wire rack. This can take several hours or overnight. Cooling sets the structure, preventing the warm brownie from melting the ice cream layer later. Patience here is key; rushing with warm brownies leads to a soggy mess when layering.
Step 9: Soften and Spread Ice Cream
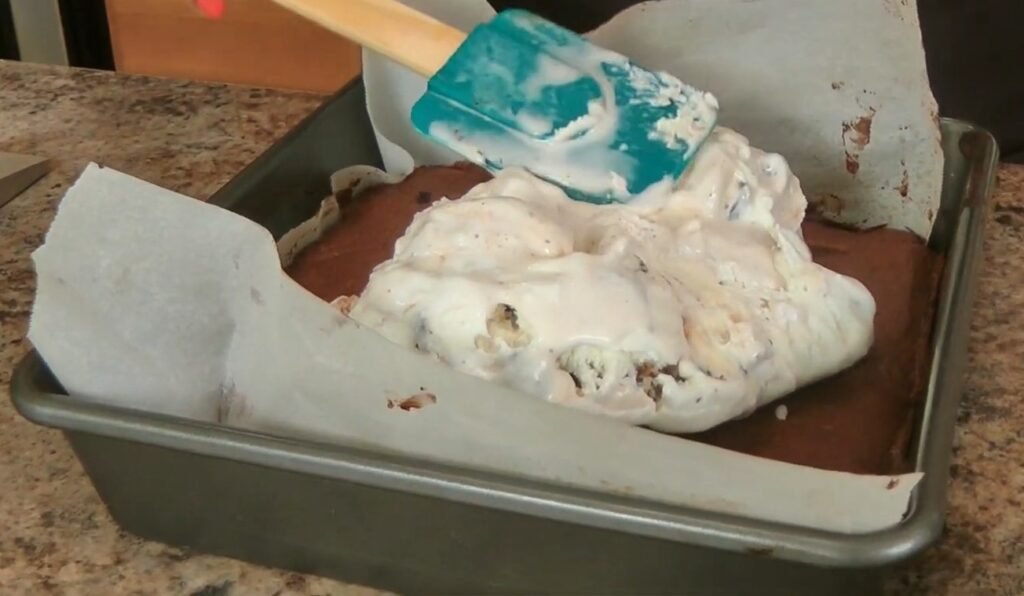
Allow 3 cups of turtle ice cream (or your preferred flavor) to soften at room temperature until spreadable. Scoop it onto the cooled brownie base and spread evenly with a spatula. Work quickly to maintain a smooth layer about 1/2 inch thick. Turtle ice cream with caramel, chocolate, and nuts pairs perfectly with the brownie, but vanilla or chocolate works too. Softening makes spreading easier without tearing the brownie.
Step 10: Add Sliced Strawberries
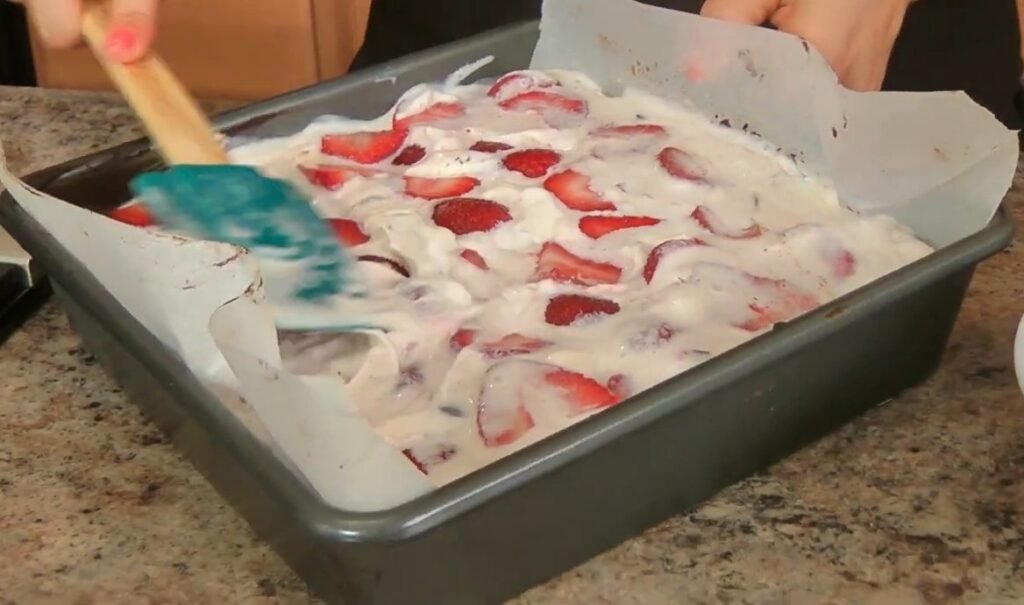
Slice 1 ½ cups of fresh strawberries thinly. Arrange them in a single layer over the ice cream, pressing lightly to nestle them in. Cover any gaps with ice cream if needed. The strawberries provide a fresh, tart contrast to the rich sweetness, elevating the dessert as discovered in a bakery ice cream cake inspiration. They are optional but highly recommended for brightness.
Step 11: First Freeze
Cover the pan tightly with plastic wrap and freeze for several hours or overnight. This firms up the ice cream and brownie layers solidly. Freezing prevents melting when adding the warm ganache. Overnight freezing simplifies the process, especially if preparing ahead.
Step 12: Heat the Cream for Ganache
In a small saucepan, heat 2/3 cup heavy cream over medium heat until it reaches a simmer, with small bubbles forming at the edges. Do not boil. Meanwhile, place 1 ¼ cups semisweet chocolate pieces in a heatproof bowl. The simmering cream will melt the chocolate perfectly for a glossy topping.
Step 13: Make the Ganache
Pour the hot cream over the chocolate pieces. Let it sit undisturbed for 3 minutes. Gently push any exposed chocolate into the cream with a spatula. Then whisk vigorously until smooth and glossy. The residual heat melts the chocolate fully, creating a pourable ganache without direct heating.
Step 14: Pour and Spread Ganache
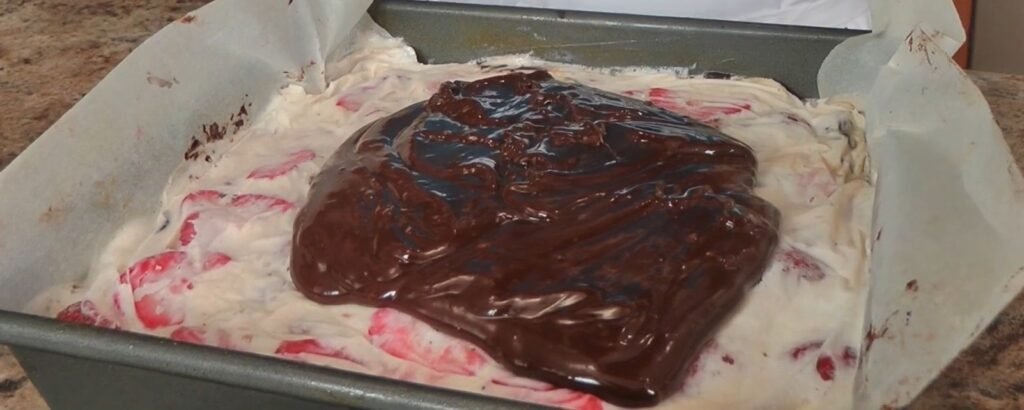
Working quickly, pour the warm ganache over the frozen ice cream layer. Spread it edge to edge with a spatula for even coverage. The warmth starts melting the ice cream slightly, so speed is essential to avoid blending layers. The ganache sets into a firm, shiny top as it freezes.
Step 15: Final Freeze and Set
Cover with aluminum foil and return to the freezer for at least 1 hour, or until fully set. For best results, freeze overnight. This ensures clean cuts and firm texture. Let thaw for 5 minutes at room temperature before slicing.
Step 16: Slice and Serve
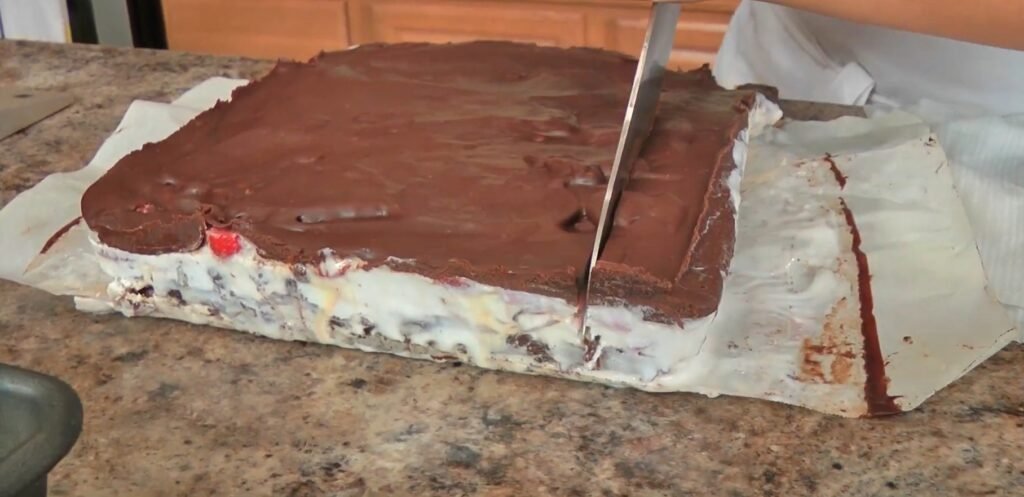
Remove from freezer and lift out using parchment overhang. Use a sharp knife, wiping it clean with a damp towel between cuts for neat edges. Cut into 18 squares or desired size. Serve immediately for the perfect frozen treat texture.
Nutritional Information
| Nutrient (per serving, approx. 1/18th) | Amount |
|---|---|
| Calories | 350 |
| Total Fat | 22g |
| Saturated Fat | 13g |
| Carbohydrates | 35g |
| Sugars | 28g |
| Protein | 4g |
Note: Values estimated based on ingredients; actual may vary.
Pairings
- Fresh whipped cream for extra lightness.
- Hot coffee to cut richness.
- Vanilla ice cream scoop on side, if not too indulgent.
- Mint chocolate cookies for crunch.
Variations
- Swap turtle ice cream for salted caramel.
- Use raspberries instead of strawberries for tangier fruit.
- Add chopped nuts to brownie batter.
- Darker chocolate for ganache for intense flavor.
Tips
- Measure chocolate before melting to ensure accurate volume.
- Cool melted chocolate slightly to avoid scrambling eggs.
- Line pan with overhanging parchment for easy lifting.
- Soften ice cream just enough to spread without dripping.
- Wipe knife with damp towel between cuts for clean slices.
- Freeze fully before ganache to prevent melting layers.
- Use high-quality chocolate for best flavor payoff.
- Make ahead and store up to a week in freezer.
- Thaw bars 5 minutes before serving for easier cutting.
- Press strawberries gently into ice cream to secure them.