

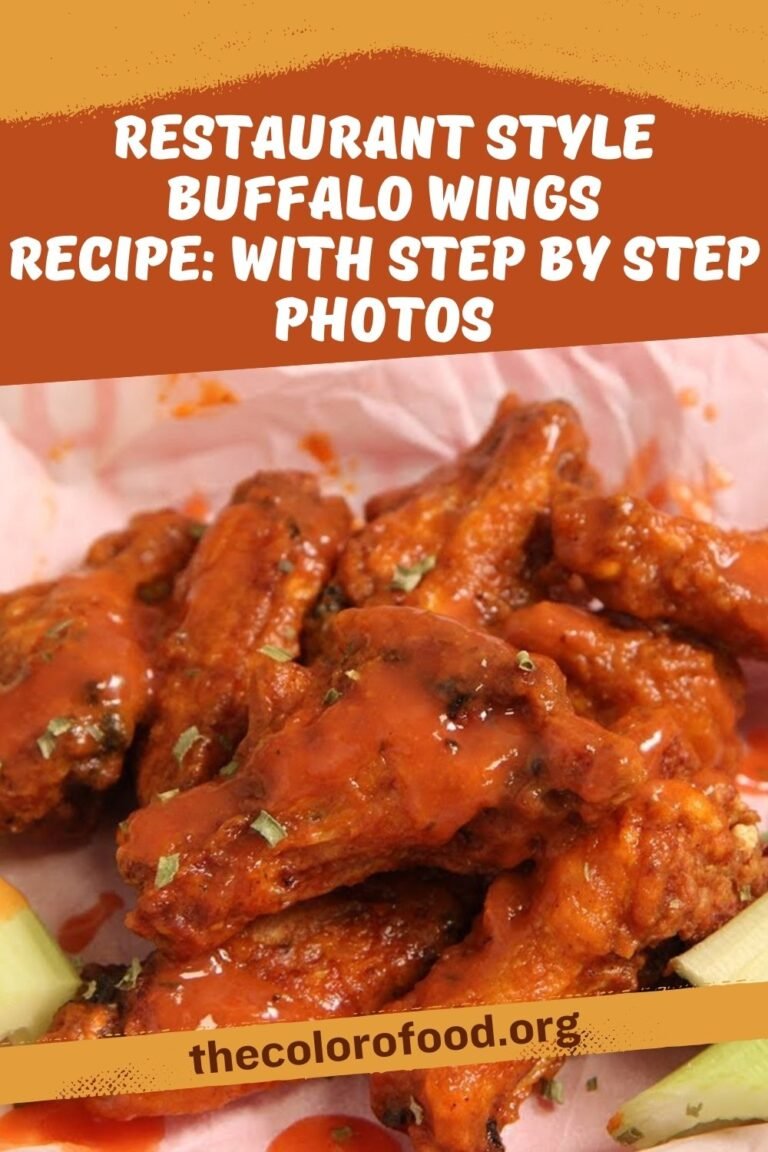
These buffalo wings deliver restaurant-quality crunch and flavor through a double-fry method and garlicky hot sauce coating. Follow these detailed steps for perfect results every time.
Ingredients
For the Wings:
- 2 lb of Wings, two sections, drummette and flat wing only
- 1/2 cup of All Purpose Flour
- 1/2 cup of Potato Starch
- 1 tsp of Granulated Garlic
- 1/2 tsp of Paprika
- 1/2 tsp of Granulated Onion
- Salt and Pepper to taste
- Oil for frying
For the Sauce:
- 1/2 cup of Hot Sauce, I use Frank Classic Hot Sauce
- 2 Tbsp of Butter
- 2 Cloves of Garlic, peeled (you can chop it fine if you don’t mind pieces of garlic throughout)
- 1 tsp of Worcestershire Sauce
1. Prepare the Wings

Start by patting the 2 lb of chicken wings dry with paper towels. Removing excess moisture ensures the coating adheres well and leads to maximum crispiness during frying. Use only the drummettes and flats, discarding the wing tips as they are not needed for this recipe. Lay them out on a clean surface and inspect for any remaining feathers or loose skin, trimming if necessary.
This initial drying step, which takes about 5 minutes, is crucial because any dampness can cause the oil to splatter and prevent even cooking. Once dry, set the wings aside while you move to the next step. Proper preparation here sets the foundation for wings that hold up to the sauce without becoming soggy later.
2. Mix the Dredging Flour

In a large shallow bowl, combine 1/2 cup all-purpose flour, 1/2 cup potato starch, 1 tsp granulated garlic, 1/2 tsp paprika, 1/2 tsp granulated onion, and salt and pepper to taste. Whisk everything together thoroughly until evenly blended. Potato starch is key here over cornstarch because it creates a lighter, crispier crust that stays crunchy even after saucing.
Taste the mixture and adjust seasoning if desired, adding a pinch more salt for bold flavor. This dry mix should have a slightly gritty texture from the starch, which will transform into a shatteringly crisp coating. If making a larger batch in the future, double the amounts but mix fresh each time for best results. Spend about 2 minutes on this to ensure no clumps form, which could lead to uneven breading.
3. Dredge the Wings
Take each wing piece and coat it generously in the flour mixture, pressing lightly to ensure full coverage on all sides. Shake off any excess flour gently to avoid clumps in the oil later. Place the dredged wings on a clean plate or wire rack in a single layer. Let them rest for 15 minutes at room temperature.
This resting period allows the flour to hydrate slightly, forming a better seal that prevents the chicken juices from leaking during frying. Do not skip this; it contributes to the signature restaurant crunch. If your kitchen is warm, a shorter rest of 10 minutes works, but aim for the full time. You will notice the coating firm up slightly, ready for the hot oil.
4. Heat Oil for First Fry
Select a heavy-bottomed skillet or Dutch oven with high sides. Add enough frying oil (like vegetable or canola) to come halfway up the sides of the pan, about 2-3 inches deep depending on your pot size. Heat the oil to 325-330 degrees Fahrenheit over medium heat. Use a deep-fry thermometer clipped to the side for accuracy, as temperature fluctuations affect texture.
This lower temperature cooks the wings through gently without burning the coating. Expect this to take 10-15 minutes; test by dropping a pinch of flour in, which should sizzle steadily but not smoke. Patience here prevents greasy results. Cover nearby surfaces with newspaper for easy cleanup from any splatters.
5. First Fry the Wings

Working in batches to avoid overcrowding (which drops the oil temperature), add the dredged wings to the 325-330 degree oil. Fry for 3 minutes per side, flipping once with tongs. They will look pale blonde, not crispy yet, which is correct for this step. Remove to a paper towel-lined plate or wire rack to drain. Maintain oil temperature between batches by adjusting heat slightly.
This first fry renders fat and partially cooks the interior, setting up the crisp exterior. Fry all wings this way, about 10-12 minutes total active frying time. Let them cool briefly while you prepare for the second fry. The kitchen will fill with an irresistible aroma at this point.
6. Prepare the Buffalo Sauce

While wings rest from the first fry, make the sauce. In a small saucepan, combine 1/2 cup hot sauce, 2 Tbsp butter, 2 peeled garlic cloves (whole or finely chopped), and 1 tsp Worcestershire sauce. Place over low heat and simmer gently for 5-7 minutes, stirring occasionally.
The garlic infuses flavor without burning, and butter melts to create a glossy emulsion. Do not boil; keep it at a bare simmer. Taste and adjust with a pinch of salt if needed. Remove from heat once fragrant and slightly thickened. This sauce clings perfectly to the hot wings, balancing heat with richness. Set aside, reheating gently if needed later.
7. Increase Oil Temperature
After the first fry, crank the heat to medium-high to bring the oil to 375-380 degrees Fahrenheit. This takes about 5 minutes; monitor closely with your thermometer. The hotter oil crisps the exterior rapidly without overcooking the inside. Wipe any flour bits from the oil surface with a skimmer for cleaner results. This step transforms the wings from tender to shatteringly crisp. Safety tip: never leave heating oil unattended. Your kitchen should smell amazing now, building anticipation.
8. Second Fry for Crispiness

Fry the par-cooked wings again in batches at 375-380 degrees, 3 minutes per side, until deeply golden brown and crispy. Use tongs to flip and remove to fresh paper towels. Listen for the intense bubbling, indicating perfect crispiness. Drain well to remove excess oil. This double-fry method, a restaurant secret, ensures juicy meat with an ultra-crunchy skin that holds sauce without sogginess. Total second fry time is another 10-12 minutes. All wings done? Proceed immediately to saucing for peak texture.
9. Toss in Sauce and Rest

Add all hot fried wings to a large bowl. Pour the warm sauce over them and toss vigorously with tongs or gloved hands until evenly coated. Let sit for 3-5 minutes in the sauce. This resting allows absorption and adhesion, preventing sauce from sliding off. The garlic pieces add bursts of flavor. Serve hot for best crunch. Total process yields addictive wings worth the effort.
Essential Equipment Guide
- Heavy-bottomed skillet or Dutch oven
- Deep-fry thermometer
- Tongs
- Wire rack or paper towel-lined plates
- Large shallow bowl for dredging
- Small saucepan for sauce
- Whisk
- Large mixing bowl for tossing
Timing and Servings
Nutritional Information
| Nutrient (per serving, approx.) | Amount |
|---|---|
| Calories | 450 |
| Protein | 25g |
| Fat | 35g |
| Carbohydrates | 10g |
| Sodium | 1200mg |
Estimates based on recipe; varies with oil absorption and exact measurements.
Pairings
- Celery and carrot sticks for crunch
- Ranch or blue cheese dressing for cooling dip
- Ice-cold beer or soda
- French fries or onion rings
Variations
- Swap hot sauce for BBQ sauce
- Add honey to sauce for sweet heat
- Use corn starch instead of potato starch
- Bake instead of fry at 425F after dredging
Pro Tips
- Dry wings thoroughly to minimize splatter and maximize crisp
- Reuse oil 2-3 times; strain after cooling
- Maintain oil temp precisely; too low makes greasy wings
- Rest dredged wings 15 min for better adhesion
- Simmer sauce low to infuse garlic without bitterness
- Fry in small batches; overcrowding drops temp
- Let sauced wings sit 5 min before serving for flavor lock-in
- For extra crisp, air dry wings overnight in fridge post-dredge
- Test doneness by ensuring internal temp hits 165F
- Scale up batter but mix fresh for even coating
Restaurant Style Buffalo Wings Recipe: With Step By Step Photos
These buffalo wings deliver restaurant-quality crunch and flavor through a double-fry method and garlicky hot sauce coating. Follow these detailed steps for perfect results every time.
- Total Time: 40 Mins
Ingredients
For the Wings:
- 2 lb of Wings, two sections, drummette and flat wing only
- 1/2 cup of All Purpose Flour
- 1/2 cup of Potato Starch
- 1 tsp of Granulated Garlic
- 1/2 tsp of Paprika
- 1/2 tsp of Granulated Onion
- Salt and Pepper to taste
- Oil for frying
For the Sauce:
- 1/2 cup of Hot Sauce, I use Frank Classic Hot Sauce
- 2 Tbsp of Butter
- 2 Cloves of Garlic, peeled (you can chop it fine if you don’t mind pieces of garlic throughout)
- 1 tsp of Worcestershire Sauce
Instructions
Start by patting the 2 lb of chicken wings dry with paper towels. Removing excess moisture ensures the coating adheres well and leads to maximum crispiness during frying. Use only the drummettes and flats, discarding the wing tips as they are not needed for this recipe. Lay them out on a clean surface and inspect for any remaining feathers or loose skin, trimming if necessary.
This initial drying step, which takes about 5 minutes, is crucial because any dampness can cause the oil to splatter and prevent even cooking. Once dry, set the wings aside while you move to the next step. Proper preparation here sets the foundation for wings that hold up to the sauce without becoming soggy later.
2. Mix the Dredging FlourIn a large shallow bowl, combine 1/2 cup all-purpose flour, 1/2 cup potato starch, 1 tsp granulated garlic, 1/2 tsp paprika, 1/2 tsp granulated onion, and salt and pepper to taste. Whisk everything together thoroughly until evenly blended. Potato starch is key here over cornstarch because it creates a lighter, crispier crust that stays crunchy even after saucing.
Taste the mixture and adjust seasoning if desired, adding a pinch more salt for bold flavor. This dry mix should have a slightly gritty texture from the starch, which will transform into a shatteringly crisp coating. If making a larger batch in the future, double the amounts but mix fresh each time for best results. Spend about 2 minutes on this to ensure no clumps form, which could lead to uneven breading.
3. Dredge the WingsTake each wing piece and coat it generously in the flour mixture, pressing lightly to ensure full coverage on all sides. Shake off any excess flour gently to avoid clumps in the oil later. Place the dredged wings on a clean plate or wire rack in a single layer. Let them rest for 15 minutes at room temperature.
This resting period allows the flour to hydrate slightly, forming a better seal that prevents the chicken juices from leaking during frying. Do not skip this; it contributes to the signature restaurant crunch. If your kitchen is warm, a shorter rest of 10 minutes works, but aim for the full time. You will notice the coating firm up slightly, ready for the hot oil.
4. Heat Oil for First FrySelect a heavy-bottomed skillet or Dutch oven with high sides. Add enough frying oil (like vegetable or canola) to come halfway up the sides of the pan, about 2-3 inches deep depending on your pot size. Heat the oil to 325-330 degrees Fahrenheit over medium heat. Use a deep-fry thermometer clipped to the side for accuracy, as temperature fluctuations affect texture.
This lower temperature cooks the wings through gently without burning the coating. Expect this to take 10-15 minutes; test by dropping a pinch of flour in, which should sizzle steadily but not smoke. Patience here prevents greasy results. Cover nearby surfaces with newspaper for easy cleanup from any splatters.
5. First Fry the WingsWorking in batches to avoid overcrowding (which drops the oil temperature), add the dredged wings to the 325-330 degree oil. Fry for 3 minutes per side, flipping once with tongs. They will look pale blonde, not crispy yet, which is correct for this step. Remove to a paper towel-lined plate or wire rack to drain. Maintain oil temperature between batches by adjusting heat slightly.
This first fry renders fat and partially cooks the interior, setting up the crisp exterior. Fry all wings this way, about 10-12 minutes total active frying time. Let them cool briefly while you prepare for the second fry. The kitchen will fill with an irresistible aroma at this point.
6. Prepare the Buffalo SauceWhile wings rest from the first fry, make the sauce. In a small saucepan, combine 1/2 cup hot sauce, 2 Tbsp butter, 2 peeled garlic cloves (whole or finely chopped), and 1 tsp Worcestershire sauce. Place over low heat and simmer gently for 5-7 minutes, stirring occasionally.
The garlic infuses flavor without burning, and butter melts to create a glossy emulsion. Do not boil; keep it at a bare simmer. Taste and adjust with a pinch of salt if needed. Remove from heat once fragrant and slightly thickened. This sauce clings perfectly to the hot wings, balancing heat with richness. Set aside, reheating gently if needed later.
7. Increase Oil TemperatureAfter the first fry, crank the heat to medium-high to bring the oil to 375-380 degrees Fahrenheit. This takes about 5 minutes; monitor closely with your thermometer. The hotter oil crisps the exterior rapidly without overcooking the inside. Wipe any flour bits from the oil surface with a skimmer for cleaner results. This step transforms the wings from tender to shatteringly crisp. Safety tip: never leave heating oil unattended. Your kitchen should smell amazing now, building anticipation.
8. Second Fry for CrispinessFry the par-cooked wings again in batches at 375-380 degrees, 3 minutes per side, until deeply golden brown and crispy. Use tongs to flip and remove to fresh paper towels. Listen for the intense bubbling, indicating perfect crispiness. Drain well to remove excess oil. This double-fry method, a restaurant secret, ensures juicy meat with an ultra-crunchy skin that holds sauce without sogginess. Total second fry time is another 10-12 minutes. All wings done? Proceed immediately to saucing for peak texture.
9. Toss in Sauce and RestAdd all hot fried wings to a large bowl. Pour the warm sauce over them and toss vigorously with tongs or gloved hands until evenly coated. Let sit for 3-5 minutes in the sauce. This resting allows absorption and adhesion, preventing sauce from sliding off. The garlic pieces add bursts of flavor. Serve hot for best crunch. Total process yields addictive wings worth the effort.
- Prep Time: 20 Mins
- Cook Time: 20 Mins


