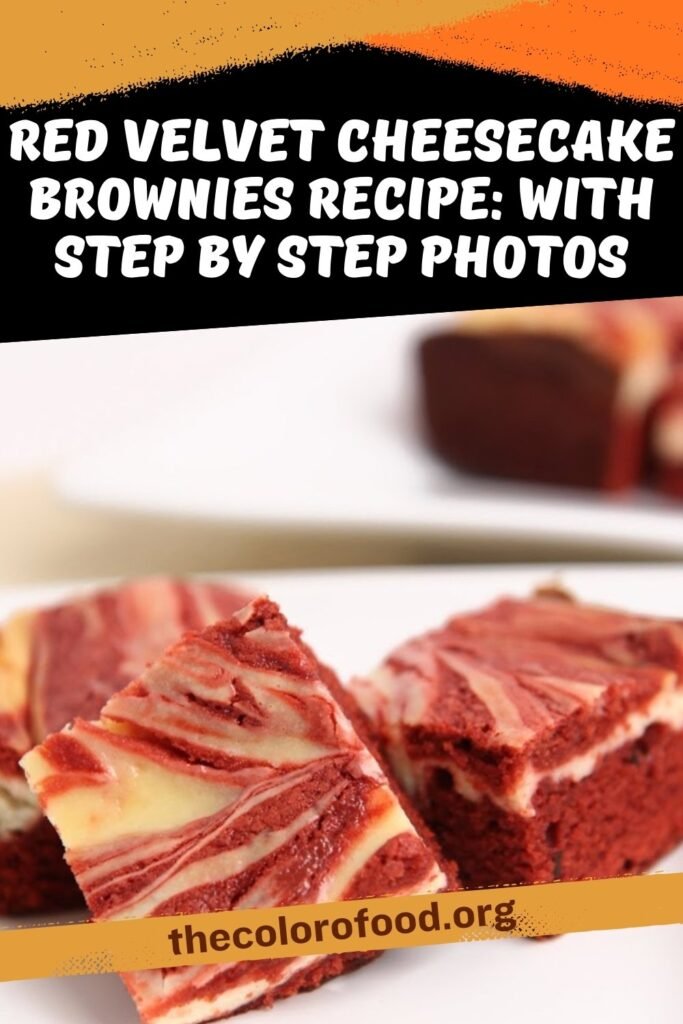
Red Velvet Cheesecake Brownies combine a vibrant red velvet brownie base with a creamy cheesecake topping for a decadent treat. This recipe yields moist brownies swirled with cheesecake, perfect for sharing.
Ingredients
Brownie Layer:
- 1/2 cup of Unsalted Butter, softened at room temperature
- 1 cup of Granulated Sugar
- 1/4 tsp of Salt
- 2 eggs
- 3/4 cup of Flour
- 3 Tbsp of Cocoa powder
- 1 tsp of Distilled White Vinegar
- 1 tsp of Vanilla Extract
- Red food coloring (enough for desired red color)
Cream Cheese Filling:
- 8oz of Cream Cheese, softened at room temperature
- 1 Egg
- 3-1/2 Tbsp of Sugar
- 1 tsp of Vanilla Extract
1. Essential Equipment Guide
- Standing mixer or handheld electric mixer
- 8×8 inch baking pan
- Parchment paper
- Non-stick spray
- Spatula
- Butter knife
- Small spoons
- Measuring cups and spoons
2. Prep and Cook Details
Step 1: Prepare the Baking Pan
Start by greasing an 8×8 inch square baking pan with non-stick spray. Line the bottom with parchment paper, ensuring it comes up the sides for easy removal later. This setup prevents sticking and allows clean lifting of the brownies after baking.
Preheat your oven to 350 degrees Fahrenheit. Proper preheating ensures even cooking throughout the brownies. Take this time to ensure all ingredients are at room temperature, especially the butter and cream cheese, as this affects texture.
Step 2: Cream Butter and Sugar
In the bowl of a standing mixer fitted with a paddle attachment, add the 1/2 cup softened unsalted butter and 1 cup granulated sugar. Cream them together on medium speed until light and fluffy, about 2-3 minutes. This step incorporates air for a tender crumb.
Scrape down the sides of the bowl with a spatula to ensure even mixing. Room temperature butter blends smoothly, avoiding lumps in the batter. Patience here leads to better emulsion.
Step 3: Add Eggs and Vanilla
Add the 2 eggs and 1 tsp vanilla extract to the creamed butter-sugar mixture. Beat on medium speed until fully combined and the mixture is smooth. Eggs bind the batter and add moisture for fudginess.
Scrape the bowl again if needed. Overmixing at this stage can toughen the brownies, so mix just until no egg streaks remain. The batter should look glossy.
Step 4: Incorporate Cocoa and Salt
Sift in 3 Tbsp cocoa powder and add 1/4 tsp salt. Mix on low speed until the cocoa is fully incorporated, scraping as necessary. Cocoa provides the chocolate flavor essential to red velvet.
Cocoa can clump, so thorough mixing ensures even color and taste. This creates the base for the signature red velvet tang.
Step 5: Add Food Coloring and Vinegar
Add red food coloring, starting with a few drops, until the batter reaches a deep red hue. Then mix in 1 tsp distilled white vinegar. The vinegar reacts with the cocoa for authentic red velvet flavor and color enhancement.
Mix between additions for even distribution. Adjust coloring gradually to avoid over-saturating. This step defines the visual appeal.
Step 6: Fold in Flour
Add 3/4 cup flour last. Mix on low speed just until incorporated, avoiding overmixing to keep brownies tender. Flour provides structure without making them cakey.
The batter will thicken. Stop mixing once flour disappears to prevent gluten development. Reserve about 1/4 cup of batter in a small bowl for swirling later.
Step 7: Spread Base Batter
Pour the remaining batter into the prepared pan. Spread evenly with a spatula, creating a smooth layer about 1/2 inch thick. An even base ensures uniform baking.
Do not worry about perfection; minor imperfections get covered. Tap the pan gently to release air bubbles.
Step 8: Make Cream Cheese Filling
In a separate bowl, use a handheld mixer to cream 8oz softened cream cheese until smooth. Add 1 egg, 3-1/2 Tbsp sugar, and 1 tsp vanilla extract. Beat until lump-free and creamy.
Loosen cream cheese first with a spatula for easier blending. Whisk vigorously if needed for smoothness. This filling adds tangy contrast.
Step 9: Spread Cheesecake Layer
Pour the cream cheese mixture over the brownie base. Spread gently with a spatula, smoothing as best as possible despite minor lumps. The cheesecake layer should cover entirely.
Uneven spreading is fine; swirling hides flaws. Refrigerate briefly if filling is too soft for control.
Step 10: Swirl Reserved Batter
Dollop the reserved 1/4 cup brownie batter over the cheesecake layer using two small spoons. Use a butter knife to swirl gently back and forth, creating marble patterns.
Avoid over-swirling to preserve distinct layers. This technique blends flavors beautifully without muddling.
Step 11: Bake the Brownies
Bake at 350 degrees for 30-35 minutes, until the top is set and a toothpick inserted in the center comes out with moist crumbs, not wet batter. Edges may set first.
Oven times vary; check at 30 minutes. Overbaking dries the cheesecake.
Step 12: Cool and Cut
Cool completely in the pan on a wire rack, at least 2 hours. Use parchment overhang to lift out. Cut into 16 squares with a sharp knife.
Refrigerate for firmer slices. Warm knife in hot water for clean cuts, wiping between slices.
3. Nutritional Information
| Nutrient (per serving, 1/16th) | Amount |
|---|---|
| Calories | 220 |
| Total Fat | 13g |
| Saturated Fat | 8g |
| Cholesterol | 65mg |
| Sodium | 120mg |
| Total Carbohydrates | 23g |
| Sugars | 18g |
| Protein | 3g |
*Estimates based on ingredients; actual values vary.
4. Pairings
- Strong black coffee to balance sweetness.
- Vanilla ice cream for extra creaminess.
- Fresh berries like raspberries for tart contrast.
- Milk or hot chocolate for classic pairing.
5. Variations
- Use beet juice instead of food coloring for natural red.
- Add white chocolate chips to brownie batter.
- Incorporate crushed Oreos into cheesecake filling.
- Make gluten-free with almond flour substitute.
Tips for Perfect Results
- Always use room temperature ingredients for smooth batters; cold butter causes lumps.
- Measure flour by spooning into the cup and leveling, not scooping, to avoid dense brownies.
- For intense red color, use gel food coloring; liquid may require more drops.
- If swirling looks messy, practice on parchment first; taste remains unaffected.
- Cool brownies fully before cutting; refrigeration firms the cheesecake for neat squares.
- Store in airtight container up to 4 days at room temp or 1 week chilled.
- Freeze individually wrapped squares for up to 2 months; thaw at room temp.
- Scale up for 9×13 pan, increasing bake time by 10 minutes.
- Test doneness with toothpick; slight moistness ensures fudgy center.
- Non-stick spray plus parchment guarantees easy release every time.
These brownies deliver rich chocolate, tangy cheesecake, and festive red in every bite. Ideal for parties or treats.