Ingredients
For the Crust
- 1 ½ cups of Crushed Spiced Wafers
- 1/3 cup of Unsalted Butter, melted
- ¼ cup of Granulated Sugar
For the Filling
- 3 Packages of Cream Cheese, at room temperature
- 3/4 cup of Granulated Sugar
- ½ cup of Brown Sugar
- 2 Eggs
- 15 oz Can of Pumpkin Puree
- 2/3 cup of Evaporated Milk
- 2 Tbsp of Corn Starch
- 1 Tbsp of Pumpkin Pie Spice
For the Topping
- 1 container (16 ounces) of Sour Cream
- 1/3 cup of Granulated Sugar
- 1 Tsp of Vanilla Extract
Instructions
Start by preheating your oven to 350 degrees Fahrenheit to ensure even baking from the beginning. Take your 9-inch springform pan and lightly spray it with non-stick cooking spray to prevent sticking. Wrap the outside bottom of the pan with aluminum foil, creating a tight seal to catch any potential leaks during baking, though this recipe is designed to be leak-proof without a water bath. Place the prepared pan on a baking sheet for extra stability and ease of handling. This setup guarantees a smooth release later and protects your oven from drips. Allow the oven to fully preheat while you move to the crust preparation.
Step 2: Crush the Wafers for Crust Base
For the crust, begin by crushing 1 ½ cups of spiced wafers into fine crumbs, which provide a flavorful, gingersnap-like foundation that complements the pumpkin perfectly. Use a food processor for speed and uniformity, pulsing until they resemble fine sand, or place them in a ziplock bag and bash with a rolling pin for a hands-on approach. The spiced wafers add warmth and depth without overpowering the filling. Ensure the crumbs are as fine as possible to avoid a gritty texture in the baked crust. This step takes just moments but sets the tone for the entire dessert.
Step 3: Mix and Form the Crust
In a large bowl or the bowl of your standing mixer, combine the crushed spiced wafers, ¼ cup of granulated sugar, and 1/3 cup of melted unsalted butter. Mix thoroughly until the mixture resembles wet sand, holding together when squeezed. Press this evenly into the bottom of the springform pan and up the sides about one inch for structural support and to contain the filling. Use the bottom of a small ramekin or glass to pack it firmly and create smooth edges. Bake at 350 degrees for 7 to 8 minutes, until lightly set and fragrant. This par-bake step gives the crust a head start, ensuring it stays crisp under the moist filling.
Step 4: Prepare the Creamy Filling
While the crust bakes, assemble the filling by placing 3 packages of room-temperature cream cheese into the same mixing bowl or food processor to save cleanup time. Add 3/4 cup granulated sugar, ½ cup brown sugar, 2 eggs, 15 oz can of pumpkin puree, 2/3 cup evaporated milk, 2 Tbsp corn starch, and 1 Tbsp pumpkin pie spice. Start mixing on low speed until incorporated, then increase to medium for about one minute until ultra-smooth and creamy. The corn starch acts as a stabilizer for the custard-like texture, while the evaporated milk adds silkiness without watering it down. Scrape down the sides and bottom to ensure no lumps remain, as they will melt away during baking.
Step 5: Pour and Bake the Filling
Remove the crust from the oven and let it cool for a moment. Pour the smooth pumpkin filling over the warm crust, using a spatula to spread it evenly and release any air bubbles by gently tapping the pan. Return to the 350-degree oven and bake for 50 minutes to 1 hour, until the edges are set but the center still jiggles slightly, indicating a perfect creamy finish upon cooling. Avoid overbaking to prevent cracks, though minor ones will be hidden by the topping. The aroma of spices filling your kitchen at this stage is irresistible.
Step 6: Whip Up the Sour Cream Topping
After baking the filling for an hour, mix the topping in a small bowl: 16 ounces sour cream, 1/3 cup granulated sugar, and 1 tsp vanilla extract until smooth and glossy. This tangy layer contrasts beautifully with the sweet pumpkin, transforming into a custard-like glaze when baked. Spread it evenly over the hot cheesecake surface, covering any imperfections like small cracks seamlessly. Bake for an additional 5 minutes to set the topping without browning it.
Step 7: Cool and Chill Thoroughly
Remove from the oven and let the cheesecake cool completely on a wire rack at room temperature for about 1 to 2 hours. This gradual cooling prevents shocking the structure and minimizes cracking. Cover loosely and refrigerate for at least 6 hours, or overnight for the best texture and flavor melding. Patience here rewards you with slices that hold their shape perfectly. The next day, run a butter knife dipped in warm water around the edge to loosen before releasing the springform.
Step 8: Serve with Elegance
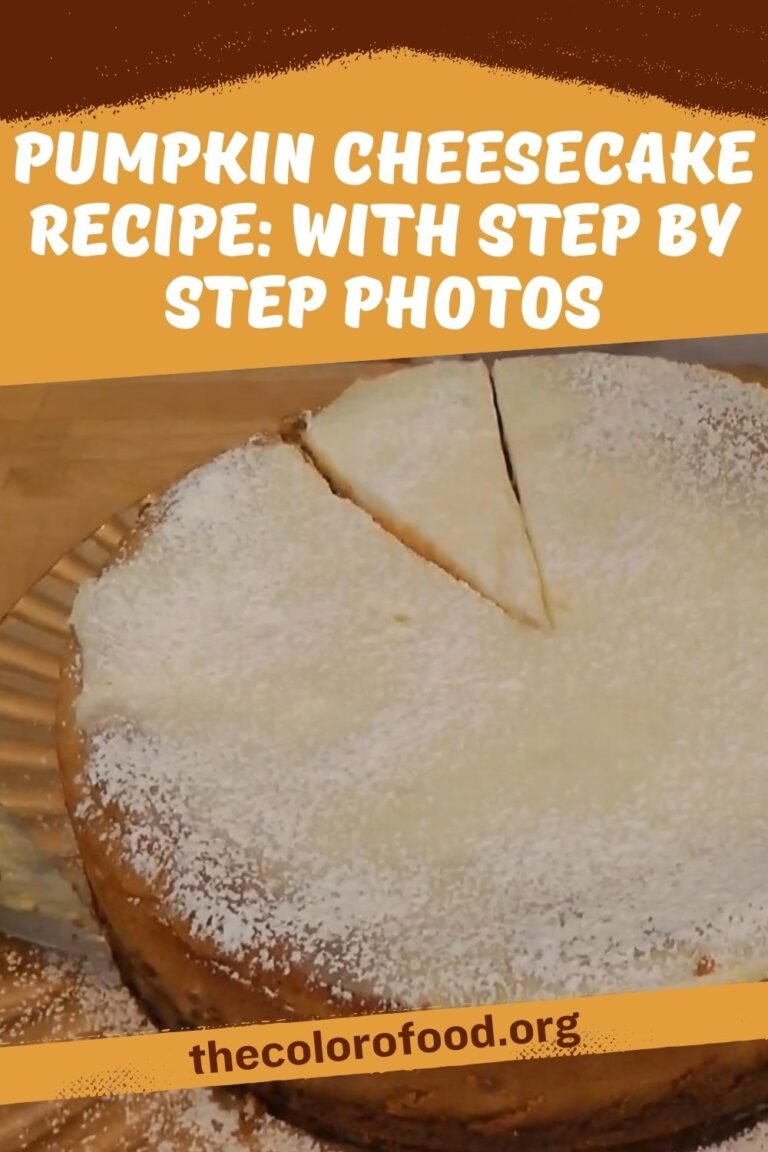
Unmold the chilled cheesecake onto a serving platter. For a stunning finish, sift confectioners’ sugar lightly over the top, creating a snowy effect that highlights the layers. Slice with a sharp, warm knife for clean cuts, revealing the spiced crust, orange pumpkin center, and creamy white topping. Serve at room temperature for peak flavor. This dessert impresses with its professional look and crowd-pleasing taste.
- Prep Time: 20 Mins
- Cook Time: 1 Hr 13 Mins