

Homemade Berry Topped Cheesecake is a creamy, decadent dessert that delivers bakery-quality results with straightforward steps. This recipe uses a simple graham cracker crust, a rich cheesecake filling, and a fresh berry topping for the perfect finish.
Ingredients
For the Crust
- 1 ¼ cups Graham Cracker Crumbs
- 6 tbsp Unsalted Butter, melted
- ¼ cup Sugar
For the Cheesecake
- 5 8oz packages Cream Cheese, room temperature
- 1 cup Sour Cream
- Zest of 1 small Lemon
- 4 Eggs
- 1 tsp Salt
- 1 tsp Vanilla
- 1 ½ cups Sugar
- ¼ cup All Purpose Flour
For the Berry Topping
- ¾ cup Raspberry Preserves
- Fresh Berries (raspberries, blueberries, blackberries)
Essential Equipment Guide
- 10-inch springform pan (3 inches high)
- Aluminum foil
- Mixing bowl
- Hand or stand mixer with paddle attachment
- Spatula
- Measuring cups and spoons
- Zester or fine grater
- Small saucepan
- Oven
Recipe Timing and Yield
- Prep Time: 30 minutes
- Cook Time: 1 hour 28 minutes (8 minutes crust + 1 hour 20 minutes cheesecake)
- Servings: 12
Step 1: Prepare the Oven and Pan
Preheat your oven to 325 degrees Fahrenheit right at the start to ensure everything flows smoothly. Take your 10×3-inch springform pan and line the outside bottom with aluminum foil. This step prevents any potential butter leaks from the crust during baking and keeps your oven clean. Spray the inside of the pan lightly with non-stick cooking spray for easy release later.
Place the pan on a baking sheet if you like for extra stability, but it is not required. Double-check that your oven rack sits in the center position. This setup promotes even baking for the crust and filling. With the oven heating, you set the stage for success without extra hassle.
Step 2: Mix the Crust

In a single mixing bowl, combine 1 ¼ cups graham cracker crumbs, 6 tablespoons melted unsalted butter, and ¼ cup sugar. Stir them together until the mixture resembles wet sand in texture. This consistency holds together perfectly when pressed.
Pour the crumb mixture into the prepared springform pan. Use your hands or the bottom of a flat container to press it evenly across the bottom. Keep it simple and flat; no need to go up the sides. This creates a sturdy base that bakes to a lightly golden finish.
Step 3: Bake the Crust

Slide the pan into the preheated oven and bake for exactly 8 minutes. Watch for a lightly golden color and a fragrant aroma signaling readiness. Remove it promptly and set it aside to cool slightly while you prepare the filling.
This short bake sets the crust without over-browning. It provides the ideal crunchy contrast to the creamy cheesecake layer. Reuse the same bowl for the filling to save time and minimize cleanup.
Step 4: Combine Cheesecake Ingredients

Start with 5 packages of room-temperature cream cheese in the mixing bowl, adding any leftover crust bits if present. Beat on medium speed, then incorporate 1 ½ cups sugar until smooth. Add 4 eggs one at a time, mixing just until blended.
Next, mix in 1 cup sour cream, zest from 1 small lemon, ¼ cup all-purpose flour, 1 teaspoon vanilla extract, and 1 teaspoon salt. Beat on medium speed for about 1 minute until creamy and uniform. Scrape the bowl bottom with a spatula to ensure everything integrates fully. Avoid overmixing to prevent air bubbles that could cause cracks.
Step 5: Pour and Bake the Cheesecake

Pour the smooth filling over the baked crust, using a spatula to spread it level. Place in the 325-degree oven for 1 hour and 20 minutes. Check for set edges extending 3 inches inward, with the center still slightly jiggly.

This doneness test guarantees a perfect texture after cooling. Remove from the oven and cool on the counter for 1.5 hours. Cracks may appear on top, but the topping hides them completely. Refrigerate overnight for the best results.
Step 6: Prepare the Berry Topping

Warm ¾ cup raspberry preserves in a small saucepan over low heat for 1 minute until pourable but not boiling. This makes it easy to spread without scorching. Meanwhile, remove the chilled cheesecake from the pan by running a knife around the edges and releasing the springform ring. Peel off the foil.
Transfer to a serving plate. Drizzle the warmed preserves evenly over the top, letting it reach the edges but staying within the border. The preserves create a glossy, flavorful base for the berries.
Step 7: Arrange the Fresh Berries
Scatter fresh raspberries, blueberries, and blackberries generously over the preserves. Place them randomly for a natural, inviting look, filling nooks and crannies. No need for perfection; the rustic style enhances appeal.
Press berries lightly into the preserves to secure them. Refrigerate briefly if needed before slicing. This topping adds fresh contrast and visual beauty to the creamy cheesecake.
Step 8: Slice and Serve
Use a sharp knife to cut clean slices, wiping the blade between cuts for neat presentation. Each piece reveals layers of crunchy crust, velvety filling, and juicy berries. Serve chilled for optimal flavor and texture.
Store leftovers covered in the fridge for up to 5 days. This method ensures every bite stays fresh and delicious.
Nutritional Information
| Nutrient (per serving) | Amount |
|---|---|
| Calories | 550 |
| Total Fat | 38g |
| Saturated Fat | 22g |
| Cholesterol | 165mg |
| Sodium | 450mg |
| Total Carbohydrates | 45g |
| Sugars | 35g |
| Protein | 8g |
Values based on 12 servings; actual may vary by exact berry amounts.
Pairings
- Fresh whipped cream for extra lightness.
- Strong coffee to cut richness.
- Vanilla ice cream on the side.
- Sparkling wine for contrast.
Variations
- Use cherry preserves and cherries for a classic twist.
- Swap lemon zest for orange for citrus variety.
- Add chocolate ganache under berries.
- Make mini versions in muffin tins.
Tips
- Always use room-temperature cream cheese for lump-free batter.
- Zest lemons finely to avoid bitter pith.
- Press crust firmly for even crunch.
- Cool cheesecake slowly to minimize cracks.
- Warm preserves gently to preserve flavor.
- Choose ripe, firm berries for best presentation.
Preparation Tips Expanded: Start by organizing all ingredients mise en place style. This keeps the process seamless. Room temperature cream cheese blends effortlessly, preventing a grainy texture that ruins the silkiness. If your kitchen is cool, microwave packages briefly in 10-second bursts, unwrapped on a plate.
For the crust, pulse whole graham crackers in a food processor if crumbs are unavailable; aim for fine consistency without powder. Melt butter just until liquid to avoid greasiness. When mixing filling, add eggs gradually; this incorporates air minimally. Taste batter before baking if desired, adjusting vanilla slightly. For zest, wash lemon well and grate only the yellow outer layer.
Baking Precision: Position oven rack centrally for uniform heat. If your oven runs hot, check crust at 6 minutes. During cheesecake bake, resist peeking often to maintain steady temperature. Jiggly center firms during chill; overbaking leads to dry edges. Counter cooling for 1.5 hours prevents condensation inside. Overnight fridge sets structure perfectly, making slicing effortless. Run hot water over knife for smoother cuts through cold cheesecake.
Topping Mastery: Select vibrant, unblemished berries hours before use; wash and dry thoroughly. Warm preserves low and slow; stir constantly. Spread with offset spatula for even layer. Arrange berries starting from center outward, varying sizes for texture. Chill topped cheesecake 30 minutes to set preserves before serving. For shine, brush extra warmed preserves over berries lightly.
Storage and Freezing: Wrap tightly in plastic and foil for fridge up to a week. Freeze whole or slices up to 2 months; thaw overnight in fridge. Avoid refreezing for best quality. Crust softens slightly post-thaw, but filling holds creaminess.
Troubleshooting Common Issues: Cracks? Normal without water bath; topping conceals. Soggy crust? Ensure butter not excess and bake fully. Runny filling? Check cream cheese temperature and do not overmix. Uneven bake? Rotate pan midway if oven uneven. Berries sink? Use firmer varieties and chill preserves first.
Scaling for Crowds: Double recipe for 9-inch pans side-by-side, adjusting bake time by 10 minutes. Mini cheesecakes bake faster at 20 minutes. Always chill fully before topping.
Print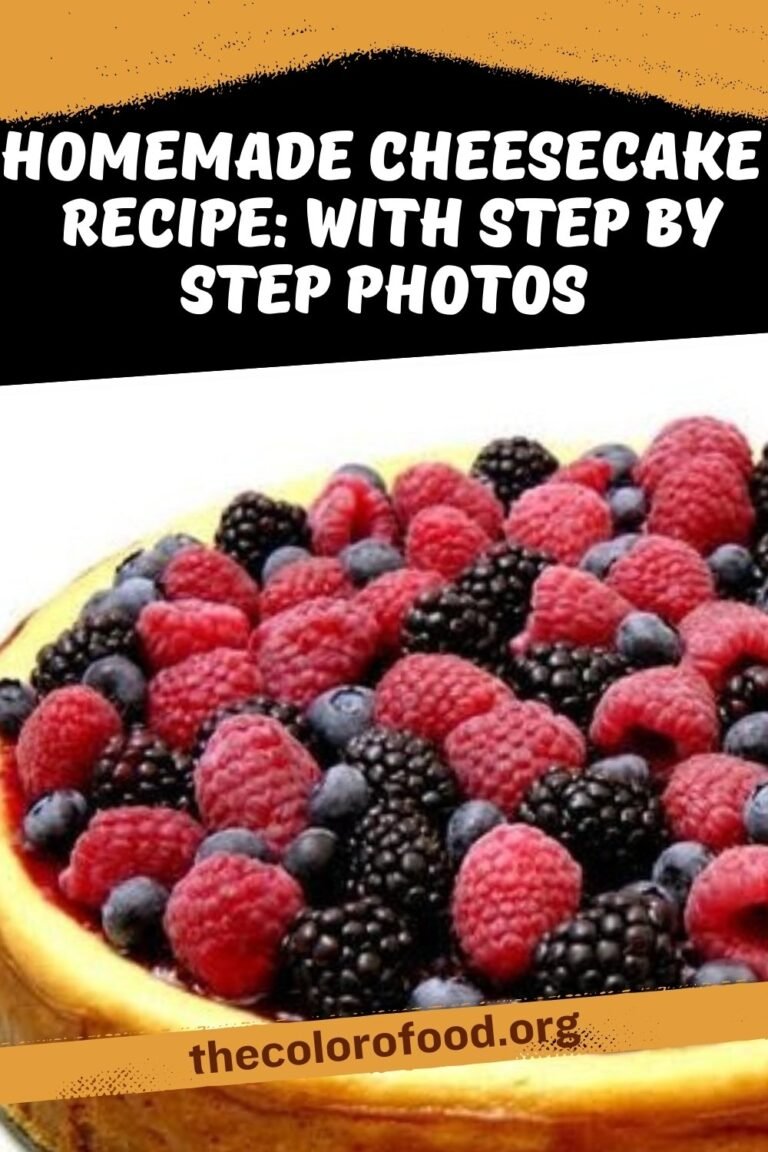
Homemade Cheesecake Recipe: With Step By Step Photos
Homemade Berry Topped Cheesecake is a creamy, decadent dessert that delivers bakery-quality results with straightforward steps. This recipe uses a simple graham cracker crust, a rich cheesecake filling, and a fresh berry topping for the perfect finish.
- Total Time: 2 Hr
Ingredients
For the Crust
- 1 ¼ cups Graham Cracker Crumbs
- 6 tbsp Unsalted Butter, melted
- ¼ cup Sugar
For the Cheesecake
- 5 8oz packages Cream Cheese, room temperature
- 1 cup Sour Cream
- Zest of 1 small Lemon
- 4 Eggs
- 1 tsp Salt
- 1 tsp Vanilla
- 1 ½ cups Sugar
- ¼ cup All Purpose Flour
For the Berry Topping
- ¾ cup Raspberry Preserves
- Fresh Berries (raspberries, blueberries, blackberries)
Instructions
Preheat your oven to 325 degrees Fahrenheit right at the start to ensure everything flows smoothly. Take your 10×3-inch springform pan and line the outside bottom with aluminum foil. This step prevents any potential butter leaks from the crust during baking and keeps your oven clean. Spray the inside of the pan lightly with non-stick cooking spray for easy release later.
Place the pan on a baking sheet if you like for extra stability, but it is not required. Double-check that your oven rack sits in the center position. This setup promotes even baking for the crust and filling. With the oven heating, you set the stage for success without extra hassle.
Step 2: Mix the CrustIn a single mixing bowl, combine 1 ¼ cups graham cracker crumbs, 6 tablespoons melted unsalted butter, and ¼ cup sugar. Stir them together until the mixture resembles wet sand in texture. This consistency holds together perfectly when pressed.
Pour the crumb mixture into the prepared springform pan. Use your hands or the bottom of a flat container to press it evenly across the bottom. Keep it simple and flat; no need to go up the sides. This creates a sturdy base that bakes to a lightly golden finish.
Step 3: Bake the CrustSlide the pan into the preheated oven and bake for exactly 8 minutes. Watch for a lightly golden color and a fragrant aroma signaling readiness. Remove it promptly and set it aside to cool slightly while you prepare the filling.
This short bake sets the crust without over-browning. It provides the ideal crunchy contrast to the creamy cheesecake layer. Reuse the same bowl for the filling to save time and minimize cleanup.
Step 4: Combine Cheesecake IngredientsStart with 5 packages of room-temperature cream cheese in the mixing bowl, adding any leftover crust bits if present. Beat on medium speed, then incorporate 1 ½ cups sugar until smooth. Add 4 eggs one at a time, mixing just until blended.
Next, mix in 1 cup sour cream, zest from 1 small lemon, ¼ cup all-purpose flour, 1 teaspoon vanilla extract, and 1 teaspoon salt. Beat on medium speed for about 1 minute until creamy and uniform. Scrape the bowl bottom with a spatula to ensure everything integrates fully. Avoid overmixing to prevent air bubbles that could cause cracks.
Step 5: Pour and Bake the CheesecakePour the smooth filling over the baked crust, using a spatula to spread it level. Place in the 325-degree oven for 1 hour and 20 minutes. Check for set edges extending 3 inches inward, with the center still slightly jiggly.
This doneness test guarantees a perfect texture after cooling. Remove from the oven and cool on the counter for 1.5 hours. Cracks may appear on top, but the topping hides them completely. Refrigerate overnight for the best results.
Step 6: Prepare the Berry ToppingWarm ¾ cup raspberry preserves in a small saucepan over low heat for 1 minute until pourable but not boiling. This makes it easy to spread without scorching. Meanwhile, remove the chilled cheesecake from the pan by running a knife around the edges and releasing the springform ring. Peel off the foil.
Transfer to a serving plate. Drizzle the warmed preserves evenly over the top, letting it reach the edges but staying within the border. The preserves create a glossy, flavorful base for the berries.
Step 7: Arrange the Fresh BerriesScatter fresh raspberries, blueberries, and blackberries generously over the preserves. Place them randomly for a natural, inviting look, filling nooks and crannies. No need for perfection; the rustic style enhances appeal.
Press berries lightly into the preserves to secure them. Refrigerate briefly if needed before slicing. This topping adds fresh contrast and visual beauty to the creamy cheesecake.
Step 8: Slice and ServeUse a sharp knife to cut clean slices, wiping the blade between cuts for neat presentation. Each piece reveals layers of crunchy crust, velvety filling, and juicy berries. Serve chilled for optimal flavor and texture.
Store leftovers covered in the fridge for up to 5 days. This method ensures every bite stays fresh and delicious.
- Prep Time: 30 Mins
- Cook Time: 1 Hr 30 Mins


