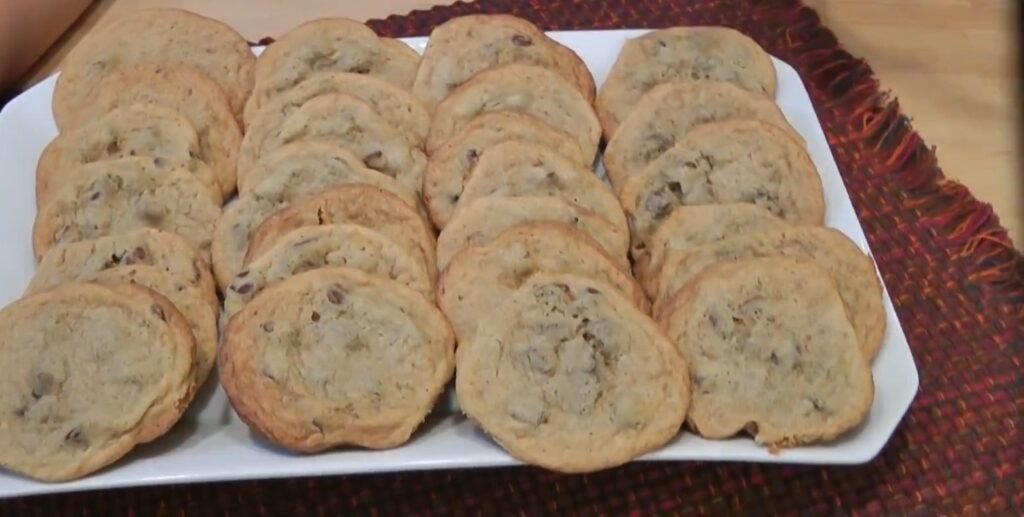
These chocolate chip cookies are crisp at the edges, soft in the center, and packed with rich buttery flavor and melty chocolate in every bite. The method is simple and reliable, making it perfect both for beginner bakers and for days when you need a big batch of classic cookies fast.
Ingredients
For about 4 dozen chocolate chip cookies, you will need:
- 2 ¼ cups all purpose flour
- 1 tsp salt
- 1 tsp baking soda
- 1/8 tsp ground cinnamon
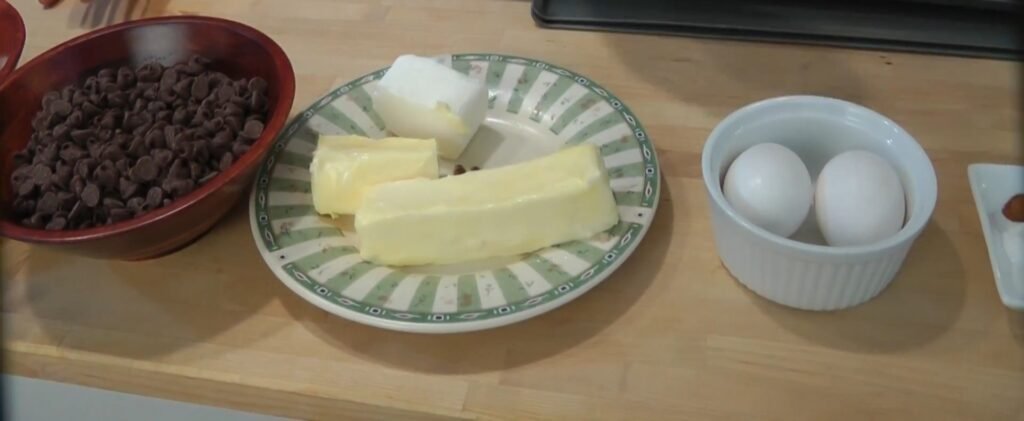
- 2 eggs
- 1 tsp vanilla extract
- 3/4 cup plus 2 Tbsp unsalted butter, at room temperature
- 2 Tbsp vegetable shortening, at room temperature
- ¾ cup granulated sugar
- ¾ cup brown sugar
- 2 cups semisweet chocolate chips
Step 1: Prepare your equipment
Start by setting your oven to preheat at 375°F (190°C) so it reaches the right temperature by the time the dough is ready. Line baking sheets with parchment paper if you like easy cleanup or follow my original direction and use ungreased baking sheets for a lightly crisp bottom. Having a stand mixer with a paddle attachment or a hand mixer ready will make the creaming step faster and help you achieve a smooth, fluffy base for the dough. Keep a rubber spatula nearby to scrape down the sides of the bowl so no pockets of sugar or butter stay unmixed.
Step 2: Mix the dry ingredients
In a medium bowl, whisk together the all purpose flour, salt, baking soda, and ground cinnamon until everything looks evenly combined. This quick step prevents the baking soda or salt from clumping in one spot and helps the cookies rise and brown evenly in the oven. The pinch of cinnamon is subtle; it does not make the cookies taste like a spice cookie, but it deepens the overall flavor and enhances the chocolate without being obvious. Once mixed, set this bowl aside so you can add it to the wet ingredients in one go later.
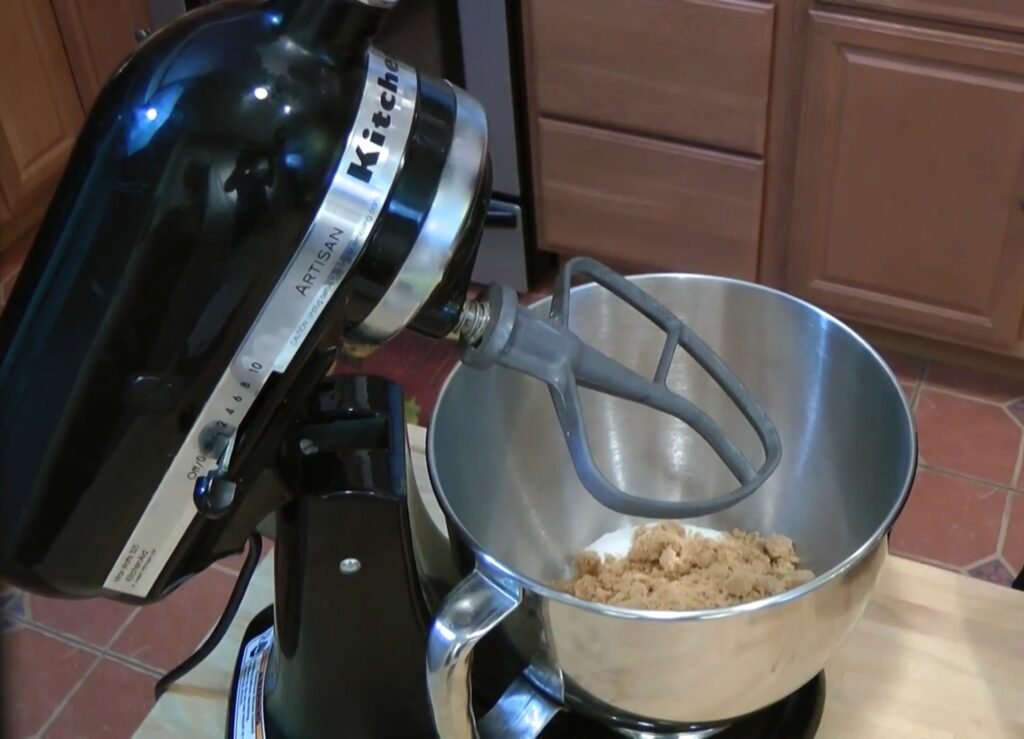
Step 3: Cream butter, shortening, and sugars

In the bowl of your mixer, add the room-temperature butter, vegetable shortening, granulated sugar, and brown sugar. Beat this mixture on medium speed until it looks light in color and creamy in texture, which usually takes a few minutes and is essential for creating a tender yet slightly crisp cookie. The combination of butter and shortening is important here: butter brings rich flavor, while shortening helps the cookies hold their shape and gives them a lovely texture that doesn’t spread too thin. Pause once or twice to scrape down the sides and bottom of the bowl so every bit of sugar blends into the fat.
Step 4: Add eggs and vanilla
Crack in the two eggs and pour in the vanilla extract, then beat again until the mixture looks smooth and uniform. The eggs help bind the dough and contribute to the structure and chew, while vanilla adds that familiar bakery-style aroma and flavor that fills the kitchen as the cookies bake. Make sure there are no streaks of egg left; if you see any, mix just a bit longer and scrape the bowl again so the wet mixture is completely homogenous before adding the dry ingredients.
Step 5: Bring the dough together
With the mixer on low speed, add the dry ingredient mixture to the bowl and mix just until the flour disappears into the dough. Avoid overmixing at this stage, because beating the flour too long can develop gluten and make the cookies tougher instead of soft and tender. When the dough looks mostly combined, stop the mixer and use a spatula to give it a few folds by hand, checking the bottom of the bowl to be sure no pockets of dry flour are hiding there.
Step 6: Fold in the chocolate chips
Add the semisweet chocolate chips to the bowl and mix briefly on low speed or fold them in by hand until they are evenly dispersed throughout the dough. Semisweet chips balance the sweetness of the dough and give you a classic chocolate chip cookie flavor that is not overly sugary. Be gentle during this step so you don’t overwork the dough; you want to keep the texture soft and slightly airy while ensuring every scoop of dough holds plenty of chocolate.
Step 7: Portion the cookies

Using a small ice cream scoop or a rounded tablespoon, drop portions of dough onto your baking sheets, leaving about 2 inches of space between each mound. This spacing allows the cookies to spread without running into each other, so each one bakes into a neat round with golden edges. Keeping the scoop size consistent helps the batch bake evenly, so all the cookies finish at the same time and you don’t end up with some underbaked and some too dark.
Step 8: Bake to golden perfection
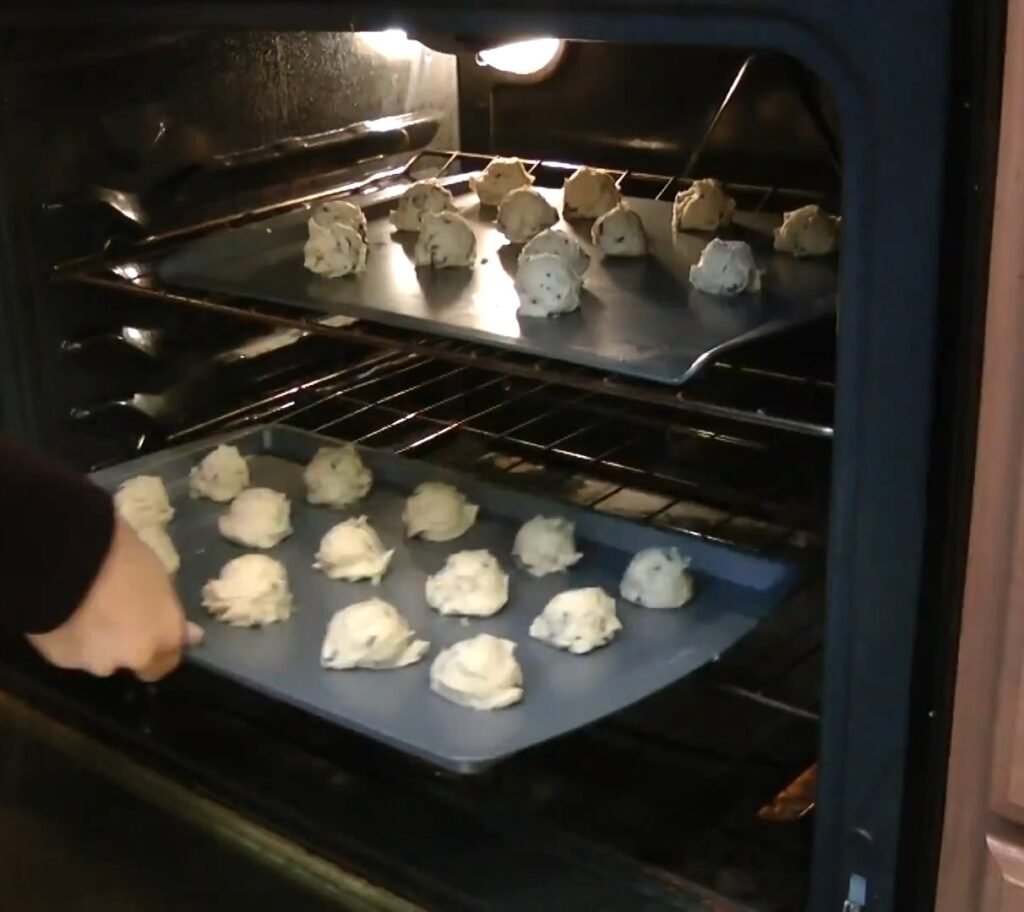
Place one tray at a time into the preheated 375°F oven and bake for about 10 to 12 minutes, or until the cookies are lightly golden brown around the edges. The centers will still look slightly soft when you pull them out, but they will continue to firm up as they cool on the hot baking sheet, which keeps the interior tender. If you prefer a crisper cookie, you can let them go an extra minute, but watch closely near the end because they can go from perfectly golden to too dark quite quickly.
Step 9: Cool and serve
Once the cookies come out of the oven, leave them on the baking sheet for a few minutes before transferring them to a cooling rack. This short rest helps them set and makes it easier to lift them without breaking, while the residual heat finishes cooking the center just enough for that ideal texture. When they are cool enough to handle, serve them slightly warm so the chocolate is still soft, or let them cool completely and store them in an airtight container to keep them fresh for several days.
Tips for the best cookies
Room-temperature ingredients make a noticeable difference in this recipe, especially for the butter, shortening, and eggs, because they blend more smoothly and create a creamier base that traps air and bakes up lighter. If the butter is too cold, it will not cream properly with the sugars, and if it is melted, the dough can spread too much and lose the thick, bakery-style look you want. Measuring flour accurately is also key; scooping flour directly with the measuring cup tends to pack it too tightly, so it is better to lightly spoon it into the cup and level it off to avoid dense, dry cookies.
The mix of brown and white sugar is another important detail that shapes both flavor and texture in these cookies. Brown sugar adds moisture and a hint of caramel depth, which contributes to a chewy center, while granulated sugar encourages spreading and a delicate crisp edge, giving you the best of both worlds in one bite. If you ever want a slightly chewier cookie, you can lean a little more toward brown sugar within the same total quantity, while increasing white sugar slightly tends to make a crisper result.
Paying attention to the baking time and appearance rather than relying only on the clock will help you nail the texture that matches your preference. When the edges are just turning golden and the centers still seem a touch pale and soft, the cookies are usually at the perfect point to remove from the oven, since carryover heat will finish setting them without drying them out. Rotating the baking sheet halfway through baking can help if your oven has hot spots, ensuring that every cookie colors evenly and preventing the ones at the back from getting too dark.
Finally, think about how you plan to serve and store the cookies so you can enjoy the batch at its best for as long as possible. Letting them cool completely before sealing them in an airtight container keeps the texture consistent and prevents condensation from making them soggy, while inserting a small piece of bread in the container can help maintain softness over a couple of days by gently sharing its moisture. For longer storage, the dough itself can be scooped and frozen on a tray, then transferred to a bag; baking from frozen with a minute or two added to the time gives you freshly baked cookies on demand whenever a craving hits.
Essential Equipment Guide
- Standing mixer with paddle attachment
- Small cookie scoop
- Parchment paper lined baking sheets
- Oven
Nutritional Information
Approximate values per serving (based on 4 dozen cookies, using standard ingredient data for Laura’s recipe).
| Nutrient | Amount per Cookie |
|---|---|
| Calories | 120 kcal |
| Total Fat | 6g |
| Carbohydrates | 16g |
| Protein | 1.5g |
| Sugar | 10g |
Pairings
- Vanilla ice cream for a classic dessert sandwich
- Cold milk to balance the sweetness
- Coffee or hot chocolate for a cozy treat
Variations
- Add 1/8 tsp ground cinnamon for subtle warmth, as in Laura’s original episode
- Substitute semisweet chips with white chocolate or nuts
- Make mocha version by mixing instant espresso into butter
Recipe Timing
Servings: Makes about 4 dozen
Prep Time: 10 minutes
Cook Time: 7-9 minutes
Print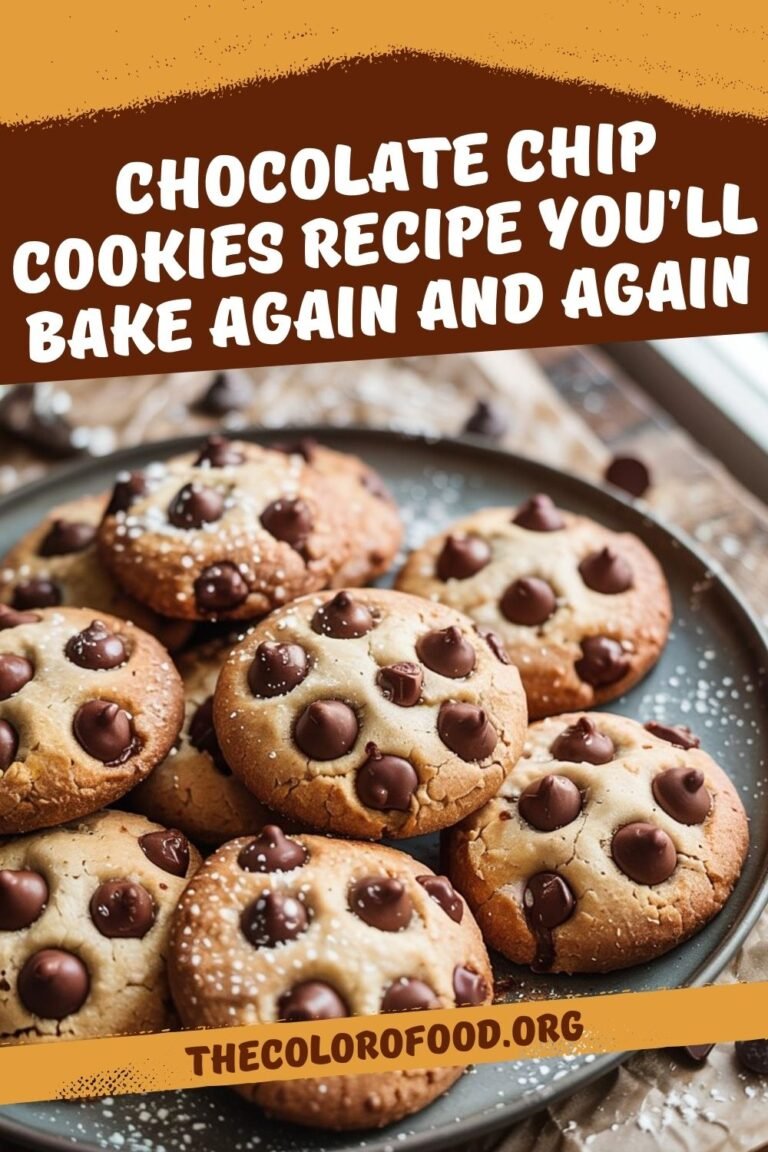
Chocolate Chip Cookies Recipe You’ll Bake Again and Again
These chocolate chip cookies are crisp at the edges, soft in the center, and packed with rich buttery flavor and melty chocolate in every bite. The method is simple and reliable, making it perfect both for beginner bakers and for days when you need a big batch of classic cookies fast.
- Total Time: 20 Mins
Ingredients
For about 4 dozen chocolate chip cookies, you will need:
- 2 ¼ cups all purpose flour
- 1 tsp salt
- 1 tsp baking soda
- 1/8 tsp ground cinnamon
- 2 eggs
- 1 tsp vanilla extract
- 3/4 cup plus 2 Tbsp unsalted butter, at room temperature
- 2 Tbsp vegetable shortening, at room temperature
- ¾ cup granulated sugar
- ¾ cup brown sugar
- 2 cups semisweet chocolate chips
Instructions
Start by setting your oven to preheat at 375°F (190°C) so it reaches the right temperature by the time the dough is ready. Line baking sheets with parchment paper if you like easy cleanup or follow my original direction and use ungreased baking sheets for a lightly crisp bottom. Having a stand mixer with a paddle attachment or a hand mixer ready will make the creaming step faster and help you achieve a smooth, fluffy base for the dough. Keep a rubber spatula nearby to scrape down the sides of the bowl so no pockets of sugar or butter stay unmixed.
Step 2: Mix the dry ingredientsIn a medium bowl, whisk together the all purpose flour, salt, baking soda, and ground cinnamon until everything looks evenly combined. This quick step prevents the baking soda or salt from clumping in one spot and helps the cookies rise and brown evenly in the oven. The pinch of cinnamon is subtle; it does not make the cookies taste like a spice cookie, but it deepens the overall flavor and enhances the chocolate without being obvious. Once mixed, set this bowl aside so you can add it to the wet ingredients in one go later.
Step 3: Cream butter, shortening, and sugarsIn the bowl of your mixer, add the room-temperature butter, vegetable shortening, granulated sugar, and brown sugar. Beat this mixture on medium speed until it looks light in color and creamy in texture, which usually takes a few minutes and is essential for creating a tender yet slightly crisp cookie. The combination of butter and shortening is important here: butter brings rich flavor, while shortening helps the cookies hold their shape and gives them a lovely texture that doesn’t spread too thin. Pause once or twice to scrape down the sides and bottom of the bowl so every bit of sugar blends into the fat.
Step 4: Add eggs and vanillaCrack in the two eggs and pour in the vanilla extract, then beat again until the mixture looks smooth and uniform. The eggs help bind the dough and contribute to the structure and chew, while vanilla adds that familiar bakery-style aroma and flavor that fills the kitchen as the cookies bake. Make sure there are no streaks of egg left; if you see any, mix just a bit longer and scrape the bowl again so the wet mixture is completely homogenous before adding the dry ingredients.
Step 5: Bring the dough togetherWith the mixer on low speed, add the dry ingredient mixture to the bowl and mix just until the flour disappears into the dough. Avoid overmixing at this stage, because beating the flour too long can develop gluten and make the cookies tougher instead of soft and tender. When the dough looks mostly combined, stop the mixer and use a spatula to give it a few folds by hand, checking the bottom of the bowl to be sure no pockets of dry flour are hiding there.
Step 6: Fold in the chocolate chipsAdd the semisweet chocolate chips to the bowl and mix briefly on low speed or fold them in by hand until they are evenly dispersed throughout the dough. Semisweet chips balance the sweetness of the dough and give you a classic chocolate chip cookie flavor that is not overly sugary. Be gentle during this step so you don’t overwork the dough; you want to keep the texture soft and slightly airy while ensuring every scoop of dough holds plenty of chocolate.
Step 7: Portion the cookiesUsing a small ice cream scoop or a rounded tablespoon, drop portions of dough onto your baking sheets, leaving about 2 inches of space between each mound. This spacing allows the cookies to spread without running into each other, so each one bakes into a neat round with golden edges. Keeping the scoop size consistent helps the batch bake evenly, so all the cookies finish at the same time and you don’t end up with some underbaked and some too dark.
Step 8: Bake to golden perfectionPlace one tray at a time into the preheated 375°F oven and bake for about 10 to 12 minutes, or until the cookies are lightly golden brown around the edges. The centers will still look slightly soft when you pull them out, but they will continue to firm up as they cool on the hot baking sheet, which keeps the interior tender. If you prefer a crisper cookie, you can let them go an extra minute, but watch closely near the end because they can go from perfectly golden to too dark quite quickly.
Step 9: Cool and serveOnce the cookies come out of the oven, leave them on the baking sheet for a few minutes before transferring them to a cooling rack. This short rest helps them set and makes it easier to lift them without breaking, while the residual heat finishes cooking the center just enough for that ideal texture. When they are cool enough to handle, serve them slightly warm so the chocolate is still soft, or let them cool completely and store them in an airtight container to keep them fresh for several days.
- Prep Time: 10 Mins
- Cook Time: 10 Mins