This recipe delivers tender, fall-off-the-bone baby back ribs with a smoky spice rub and sticky BBQ glaze, perfect for summer barbecues.
Ingredients
Gather these simple ingredients for the ultimate BBQ ribs.
- 1 Slab of Baby Back Ribs
- 2 Tbsp of Light Brown Sugar
- 1 1/2 Tbsp of Paprika
- 1 Tbsp of Chili Powder
- 1 Tbsp of Granulated Onion
- 1 Tbsp of Granulated Garlic
- 1 tsp of Dry Mustard
- Salt and Lots of Black Pepper
- 2 cups of BBQ Sauce, store bought or homemade
Step 1: Prepare the Spice Rub
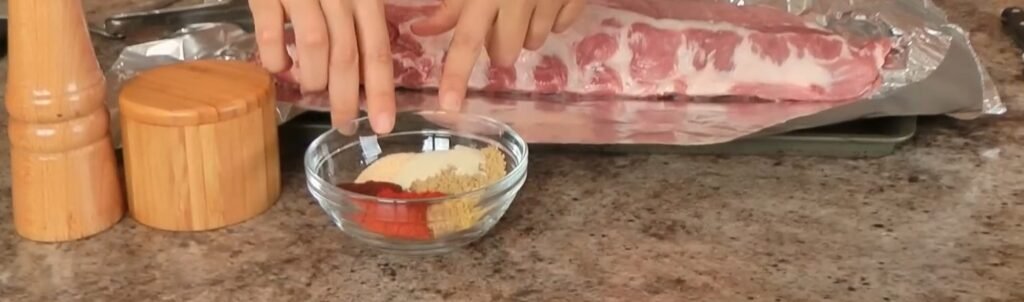
Start by combining the dry ingredients in a small bowl to create a flavorful rub that infuses the ribs with deep, smoky notes. Measure out 2 tablespoons of light brown sugar, which adds sweetness and helps form a caramelized crust during grilling. Add 1 1/2 tablespoons of paprika for that classic red hue and mild smokiness, followed by 1 tablespoon each of chili powder, granulated onion, and granulated garlic to build layers of savory, aromatic depth.
Stir in 1 teaspoon of dry mustard for a subtle tang that cuts through the richness of the meat, then season generously with salt and plenty of freshly cracked black pepper to enhance all the flavors. The black pepper provides a gentle heat that complements the sweetness without overpowering the dish. Mix everything thoroughly until the brown sugar is evenly distributed and no clumps remain, creating a coarse, fragrant powder ready to coat the ribs.
Step 2: Season the Ribs
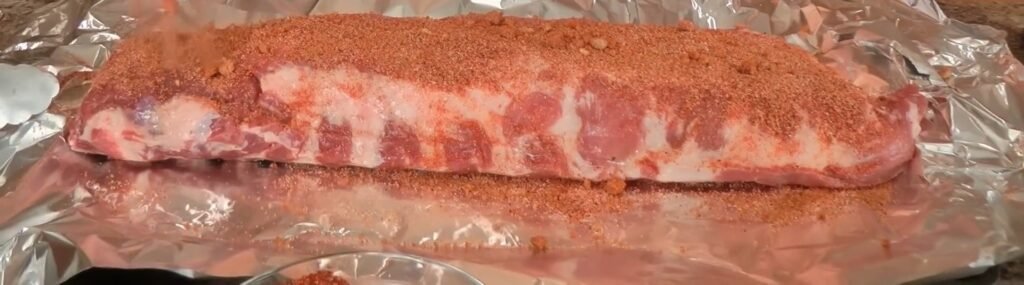
Pat the slab of baby back ribs dry with paper towels to ensure the rub adheres properly, removing any excess moisture from the surface. Choose a full slab for even cooking, as baby backs are leaner and more tender than spare ribs, making them ideal for this oven-to-grill method.
Generously sprinkle half of the spice rub over one side of the ribs, using your hands to massage it into every nook and cranny, covering the meat evenly from bone to edge.
Flip the ribs over and apply the remaining rub to the other side with the same thorough patting motion, pressing firmly so the seasoning sticks and begins to flavor the meat deeply.
Avoid spare ribs here, as they contain more fat and connective tissue that might not tenderize as perfectly in the given time. Let the ribs sit for a moment as the flavors meld, noticing how the paprika gives an instant barbecue look. This step sets the foundation for juicy, seasoned ribs that will impress at any gathering.
Step 3: Wrap and Refrigerate
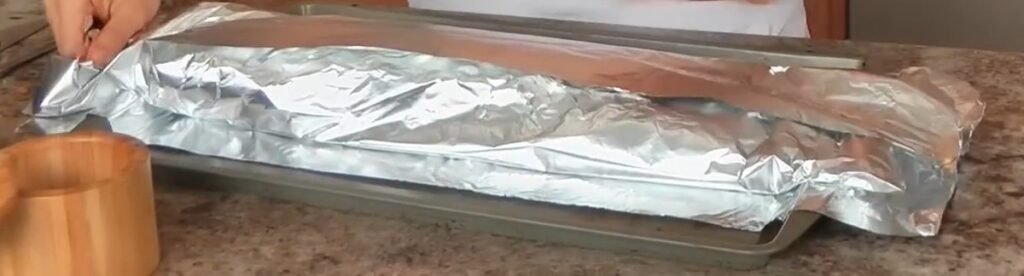
Lay out several large sheets of heavy-duty aluminum foil on a clean surface, enough to fully enclose the ribs without gaps. Place the seasoned ribs meat-side down in the center of the foil, then fold the edges up and over tightly, creating a sealed packet that traps steam and juices during cooking. The foil wrap is key to low-and-slow cooking, mimicking a smoker effect in the oven for tender results.
Double-wrap if needed for extra security, crimping the seams well to prevent leaks. Transfer the wrapped ribs to the refrigerator for at least 2 hours, or up to overnight for maximum flavor penetration. This resting period allows the salt to draw out moisture, which then mixes with the rub to form a brine that seasons the meat from within.
Patience here pays off with ribs that are not just spiced on the surface but infused throughout. Remove from the fridge 15 minutes before baking to take the chill off for even cooking.
Step 4: Oven Bake for Tenderness
Preheat your oven to 300 degrees Fahrenheit, the ideal low temperature for breaking down the collagen in the ribs without drying them out. Position the wrapped ribs on a rimmed baking sheet to catch any potential drips, ensuring the foil packet remains intact. Slide the sheet into the oven and bake for about 2 hours, or until the meat pulls away from the bones easily when tested with tongs.
During this time, the steam inside the foil packet tenderizes the ribs, making them fall-apart succulent while the rub cooks into the surface. Check doneness by gently poking through the foil; the meat should feel soft and yielding. Let the ribs rest in the foil for 10-15 minutes after baking to redistribute juices, avoiding the common mistake of rushing to the grill.
Step 5: Preheat the Grill
While the ribs rest, fire up your gas grill to medium-high heat, closing the lid for the first 10 minutes to ensure even preheating. This step creates the hot surface needed for caramelizing the BBQ sauce without burning. Clean and oil the grates lightly to prevent sticking, as the saucy ribs can adhere otherwise.
Monitor the temperature to stay around 400-450 degrees Fahrenheit, hot enough for char but controlled for basting. Gas grills work best here for quick finishing, though charcoal adds extra smoke if desired. Have tongs, a basting brush, and BBQ sauce at the ready for seamless transition.
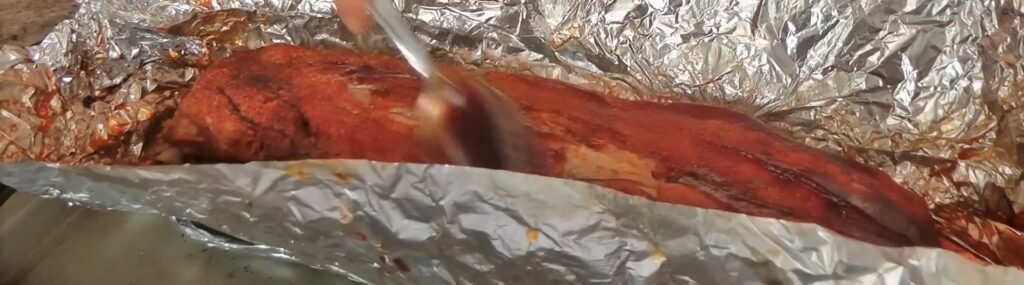
Step 6: Sauce and Grill to Perfection
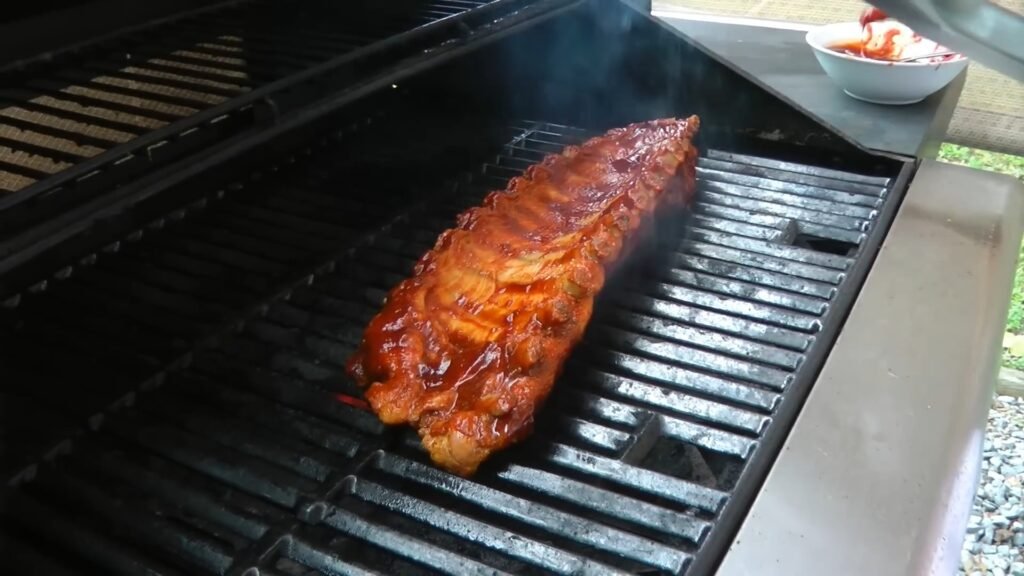
Unwrap the ribs carefully, reserving any juices if you like for extra sauce flavor. Brush both sides generously with BBQ sauce, using about 1 cup initially, letting it seep into the tender meat. Place sauce-side down on the hot grill, close the lid briefly, then flip after 4-5 minutes.
Reapply more sauce to the top side, basting every 1-2 minutes and flipping 2-3 times total for 10 minutes of grilling. Watch for bubbling sauce, charred edges, and golden caramelization, the signs of sticky, irresistible ribs. The high heat sets the glaze while the oven tenderness shines through. Remove when the sauce clings and meat pulls easily.
Step 7: Rest and Serve
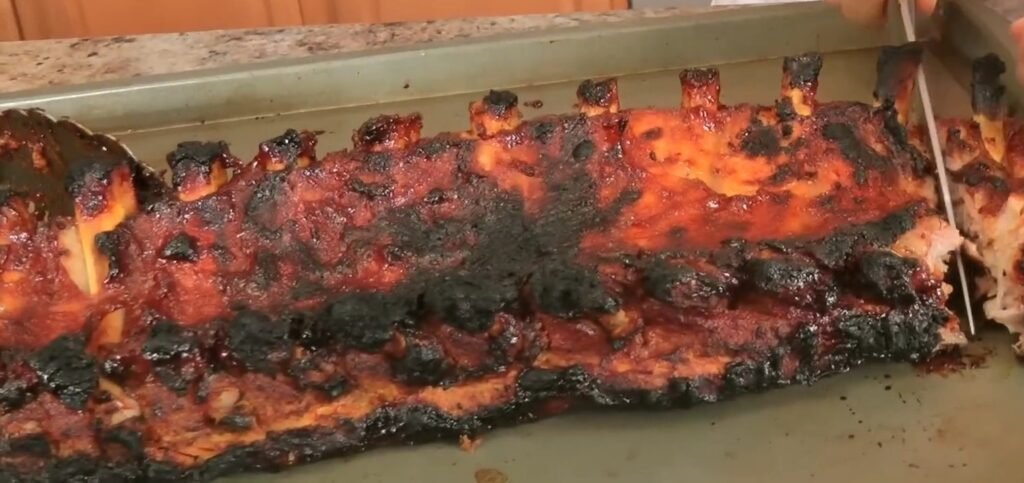
Let the ribs rest on a cutting board for 5 minutes to lock in juices, then slice between the bones into individual portions. Serve immediately with extra BBQ sauce on the side for dipping, garnished with fresh herbs if desired. These ribs pair barbecue perfection with minimal effort.
Essential Equipment Guide
Timing and Servings
Nutritional Information
Approximate values per serving (1/6 slab, based on standard baby back ribs with rub and sauce).
| Nutrient | Amount per Serving | % Daily Value |
|---|---|---|
| Calories | 480 | 24% |
| Protein | 30g | 60% |
| Fat | 28g | 36% |
| Carbohydrates | 20g | 7% |
| Sodium | 800mg | 35% |
Pairings
- Classic coleslaw for creamy crunch
- Cornbread muffins to soak up sauce
- Baked beans with smoky sweetness
- Potato salad for cool contrast
Variations
- Use spare ribs for meatier bite
- Apply apple juice spritz during grill for extra moisture
- Add chipotle powder for heat
Comprehensive Cooking Tips
- Always remove the thin membrane from the bone side of the ribs before rubbing; use a paper towel for grip to peel it away easily, ensuring maximum flavor penetration and tenderness without chewy bits. This step, often overlooked, makes a huge difference in texture.
- Choose high-quality baby back ribs with even meat coverage and pinkish hue, avoiding slabs with excessive fat caps that can lead to greasy results. Look for flexibility when bending the rack, indicating fresh quality.
- Customize the rub sweetness by adjusting brown sugar; less for savory profiles or more for candy-like glaze, tasting the mix beforehand to suit preferences.
- For oven-only version in bad weather, unwrap after 2 hours, sauce heavily, and broil on high for 5-7 minutes per side to mimic grill char, watching closely to avoid burning.
- Baste frequently on the grill but sparingly at first to prevent flare-ups from dripping sugars; use long-handled tools for safety over high flames.
- Test rib doneness by the bend test: pick up with tongs; if the bark cracks and meat pulls back 1/2 inch from bones, they are perfect.
- Make ahead by baking day before, refrigerating wrapped, then grilling fresh for parties, saving time without quality loss.
- Enhance smoke flavor by adding wood chips in a foil pouch on the grill, poked with holes, for that authentic pit-barbecue taste indoors.
- Store leftovers wrapped tightly in fridge up to 3 days; reheat wrapped in foil at 250 degrees with a splash of apple juice for moisture.
- Pair with beer brines pre-rub for deeper flavor; soak ribs in lager overnight after membrane removal.
- Scale rub for multiple slabs proportionally, but bake on separate sheets for even cooking airflow.
- Use mustard base under rub for pork chop variation, adding tang and adhesion.
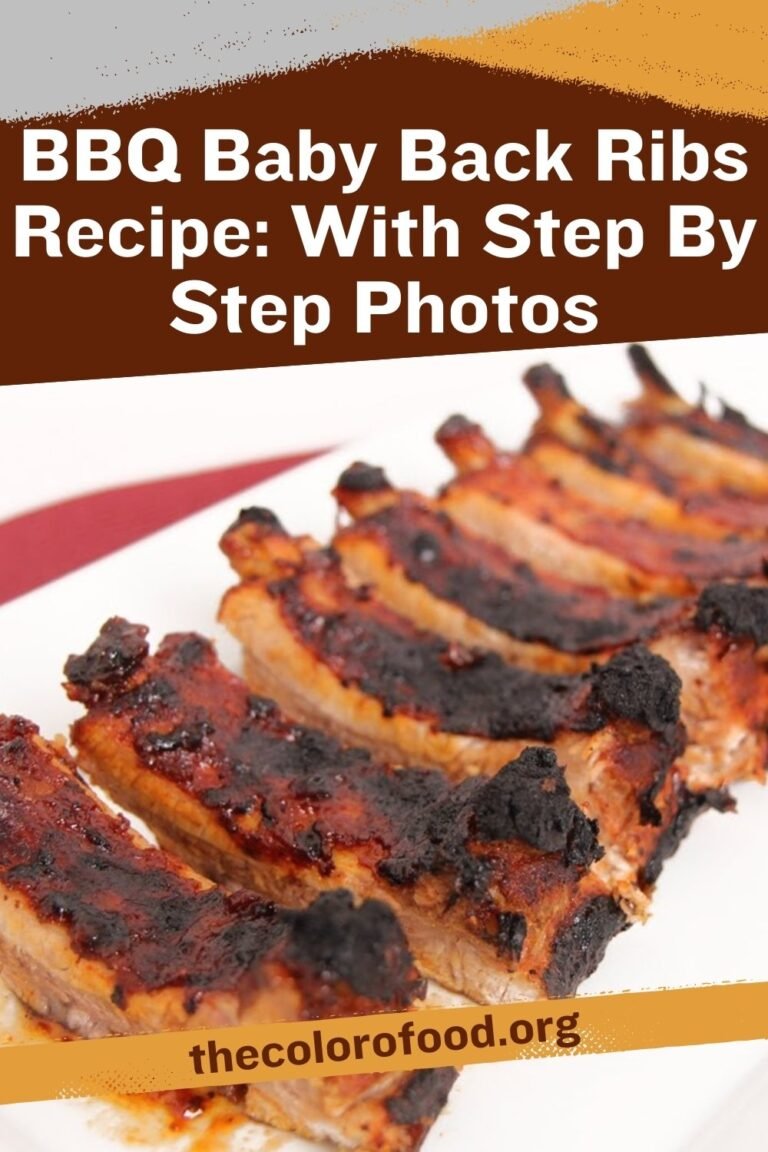
BBQ Baby Back Ribs Recipe: With Step By Step Photos
This recipe delivers tender, fall-off-the-bone baby back ribs with a smoky spice rub and sticky BBQ glaze, perfect for summer barbecues.
- Total Time: 2 Hr 25 Mins
Ingredients
- 1 Slab of Baby Back Ribs
- 2 Tbsp of Light Brown Sugar
- 1 1/2 Tbsp of Paprika
- 1 Tbsp of Chili Powder
- 1 Tbsp of Granulated Onion
- 1 Tbsp of Granulated Garlic
- 1 tsp of Dry Mustard
- Salt and Lots of Black Pepper
- 2 cups of BBQ Sauce, store bought or homemade
Instructions
Start by combining the dry ingredients in a small bowl to create a flavorful rub that infuses the ribs with deep, smoky notes. Measure out 2 tablespoons of light brown sugar, which adds sweetness and helps form a caramelized crust during grilling. Add 1 1/2 tablespoons of paprika for that classic red hue and mild smokiness, followed by 1 tablespoon each of chili powder, granulated onion, and granulated garlic to build layers of savory, aromatic depth.
Stir in 1 teaspoon of dry mustard for a subtle tang that cuts through the richness of the meat, then season generously with salt and plenty of freshly cracked black pepper to enhance all the flavors. The black pepper provides a gentle heat that complements the sweetness without overpowering the dish. Mix everything thoroughly until the brown sugar is evenly distributed and no clumps remain, creating a coarse, fragrant powder ready to coat the ribs.
Step 2: Season the RibsPat the slab of baby back ribs dry with paper towels to ensure the rub adheres properly, removing any excess moisture from the surface. Choose a full slab for even cooking, as baby backs are leaner and more tender than spare ribs, making them ideal for this oven-to-grill method.
Generously sprinkle half of the spice rub over one side of the ribs, using your hands to massage it into every nook and cranny, covering the meat evenly from bone to edge.
Flip the ribs over and apply the remaining rub to the other side with the same thorough patting motion, pressing firmly so the seasoning sticks and begins to flavor the meat deeply.
Avoid spare ribs here, as they contain more fat and connective tissue that might not tenderize as perfectly in the given time. Let the ribs sit for a moment as the flavors meld, noticing how the paprika gives an instant barbecue look. This step sets the foundation for juicy, seasoned ribs that will impress at any gathering.
Step 3: Wrap and RefrigerateLay out several large sheets of heavy-duty aluminum foil on a clean surface, enough to fully enclose the ribs without gaps. Place the seasoned ribs meat-side down in the center of the foil, then fold the edges up and over tightly, creating a sealed packet that traps steam and juices during cooking. The foil wrap is key to low-and-slow cooking, mimicking a smoker effect in the oven for tender results.
Double-wrap if needed for extra security, crimping the seams well to prevent leaks. Transfer the wrapped ribs to the refrigerator for at least 2 hours, or up to overnight for maximum flavor penetration. This resting period allows the salt to draw out moisture, which then mixes with the rub to form a brine that seasons the meat from within.
Patience here pays off with ribs that are not just spiced on the surface but infused throughout. Remove from the fridge 15 minutes before baking to take the chill off for even cooking.
Step 4: Oven Bake for TendernessPreheat your oven to 300 degrees Fahrenheit, the ideal low temperature for breaking down the collagen in the ribs without drying them out. Position the wrapped ribs on a rimmed baking sheet to catch any potential drips, ensuring the foil packet remains intact. Slide the sheet into the oven and bake for about 2 hours, or until the meat pulls away from the bones easily when tested with tongs.
During this time, the steam inside the foil packet tenderizes the ribs, making them fall-apart succulent while the rub cooks into the surface. Check doneness by gently poking through the foil; the meat should feel soft and yielding. Let the ribs rest in the foil for 10-15 minutes after baking to redistribute juices, avoiding the common mistake of rushing to the grill.
Step 5: Preheat the GrillWhile the ribs rest, fire up your gas grill to medium-high heat, closing the lid for the first 10 minutes to ensure even preheating. This step creates the hot surface needed for caramelizing the BBQ sauce without burning. Clean and oil the grates lightly to prevent sticking, as the saucy ribs can adhere otherwise.
Monitor the temperature to stay around 400-450 degrees Fahrenheit, hot enough for char but controlled for basting. Gas grills work best here for quick finishing, though charcoal adds extra smoke if desired. Have tongs, a basting brush, and BBQ sauce at the ready for seamless transition.
Step 6: Sauce and Grill to PerfectionUnwrap the ribs carefully, reserving any juices if you like for extra sauce flavor. Brush both sides generously with BBQ sauce, using about 1 cup initially, letting it seep into the tender meat. Place sauce-side down on the hot grill, close the lid briefly, then flip after 4-5 minutes.
Reapply more sauce to the top side, basting every 1-2 minutes and flipping 2-3 times total for 10 minutes of grilling. Watch for bubbling sauce, charred edges, and golden caramelization, the signs of sticky, irresistible ribs. The high heat sets the glaze while the oven tenderness shines through. Remove when the sauce clings and meat pulls easily.
Step 7: Rest and ServeLet the ribs rest on a cutting board for 5 minutes to lock in juices, then slice between the bones into individual portions. Serve immediately with extra BBQ sauce on the side for dipping, garnished with fresh herbs if desired. These ribs pair barbecue perfection with minimal effort.
- Prep Time: 15
- Cook Time: 2 Hr 10 Mins