Ingredients
- 3 lbs wings (ask your butcher to prep them for buffalo wings)
- 1/2 cup all-purpose flour
- 1 Tbsp baking powder
- Olive oil
- Your favorite hot sauce
- Ranch or bleu cheese for serving
Instructions
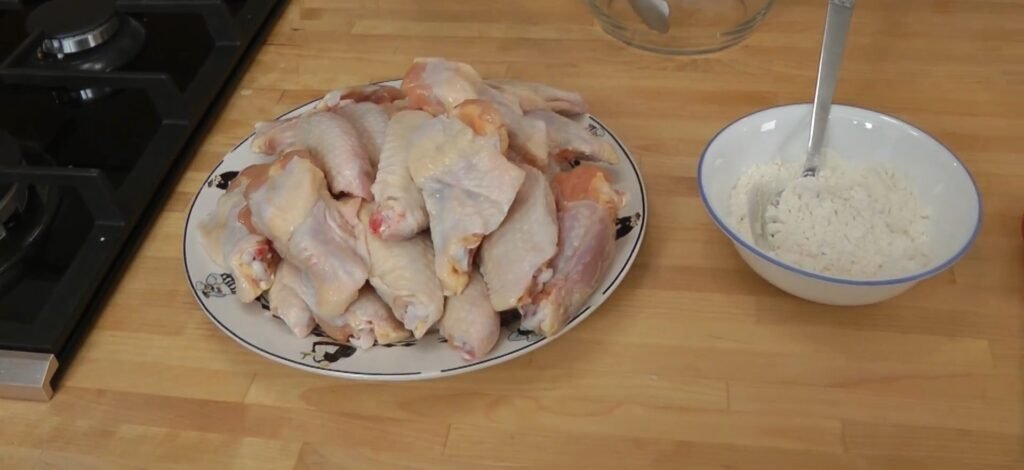
Start with fresh wings prepped by your butcher into buffalo style, which means they are split into flats and drumettes with tips removed. This preparation ensures even cooking and easy eating. Pat the wings completely dry with paper towels if needed, though the fridge step will handle most drying.
Place all 3 lbs of wings into a large mixing bowl. The bowl should be big enough to toss everything without crowding. This setup allows for even coating later on. Avoid washing the wings under water as it adds moisture we want to eliminate for crispiness.
Step 2: Mix the Coating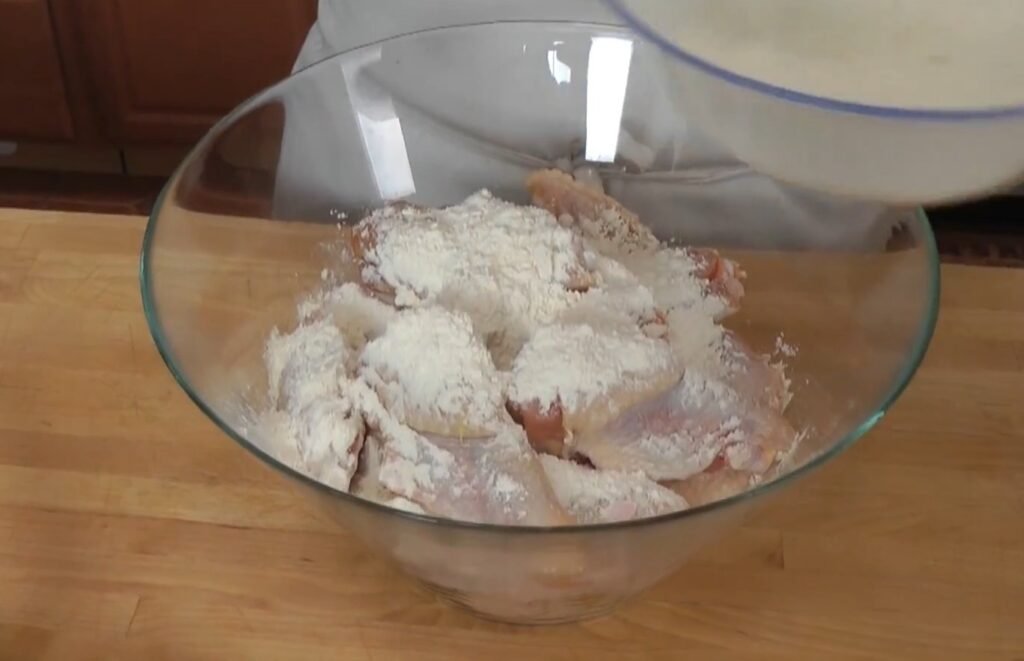
In a small bowl, combine 1/2 cup all-purpose flour with 1 Tbsp baking powder. Stir them together until fully blended. The baking powder acts as a secret weapon here; it raises the pH on the skin surface, promoting browning and extreme crispiness during baking, much like it lightens cakes but here it drives dehydration for crunch.
Sprinkle this mixture evenly over the wings in the bowl. Use your hands or a spoon to distribute it. The goal is a light, even coat on every piece, not a heavy batter. Too much flour makes them powdery and less crispy, so aim for just enough to cover without clumps.
Step 3: Toss to CoatGently toss the wings in the bowl until every surface is coated with the flour-baking powder mix. Take your time to ensure no bare spots remain, especially on the skin side. This coating absorbs moisture and sets up the crust as it dries.
The wings should look lightly dusted, not caked. If some areas seem too dry, add a pinch more mixture, but restraint is key. This step takes about 2-3 minutes but pays off hugely in texture. Patience here prevents soggy results later.
Step 4: Set Up the Rack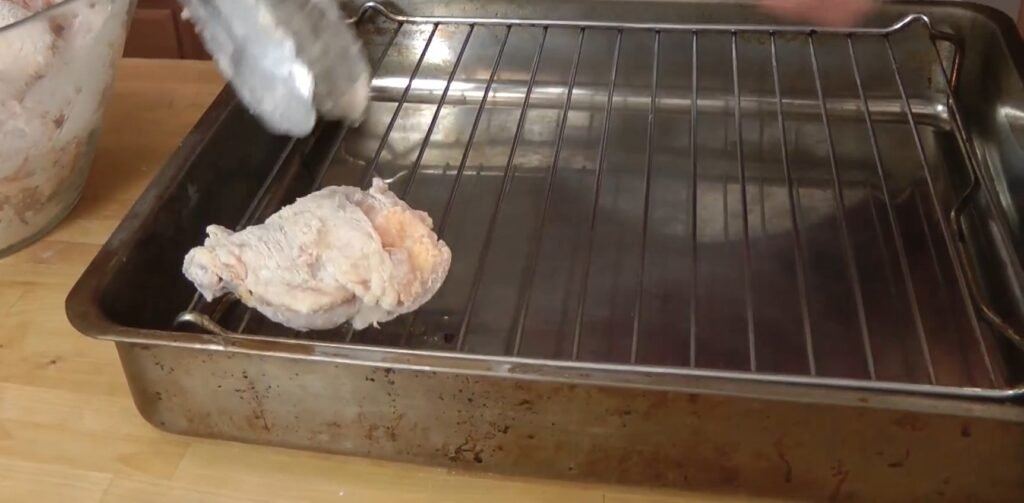
Flip a roasting rack upside down inside a large baking sheet. The rack’s bars should face up so wings sit on them securely. This elevation allows hot air to circulate fully around each wing, preventing steam buildup and sogginess on the bottom.
Line up the coated wings on the rack in a single layer, skin-side up. They can touch slightly but avoid stacking. Proper spacing ensures even crisping. Use multiple sheets if needed for 3 lbs.
Step 5: Refrigerate to DryPlace the baking sheet with wings uncovered into the fridge for at least 2 hours, ideally up to overnight. This chilling draws out surface moisture through the flour coating, making it adhere perfectly and dry the skin taut.
The fridge’s dry air works magic; you’ll see the coating firm up and skin pucker slightly. Do not cover, as that traps humidity. This step is non-negotiable for that deep golden crust without frying.
Check after 2 hours; the wings should feel dry and the coating stuck fast. If still tacky, give another 30 minutes. This dehydration mimics commercial methods but at home.
Step 6: Preheat and Oil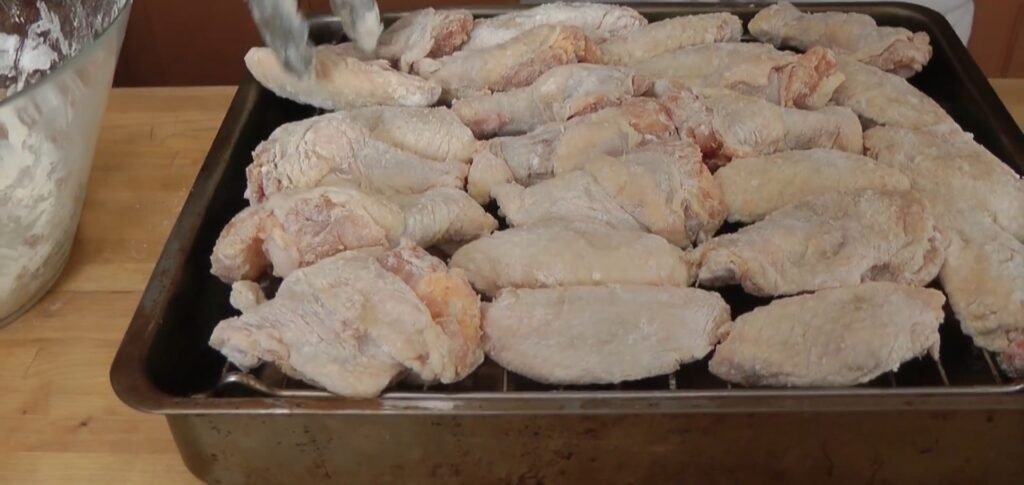
Preheat your oven to 450°F. Position racks in the upper third for even heat. High heat is crucial for rapid crisping without drying out the meat.
Remove wings from fridge. Liberally drizzle olive oil over the tops, about 1/4 cup total for 3 lbs. Rub lightly to coat skin evenly. Oil conducts heat, accelerating browning and adding subtle richness.
Step 7: First Bake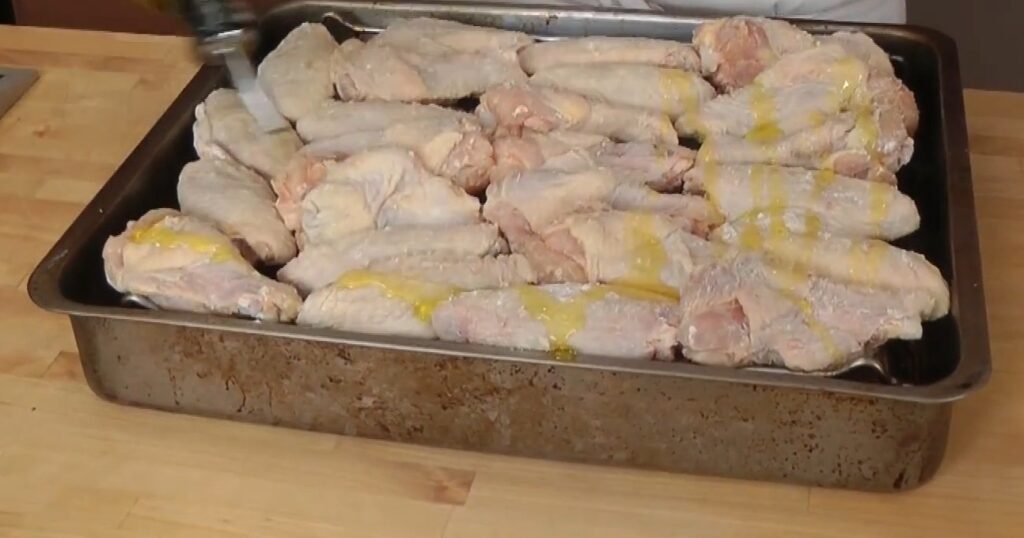
Slide the baking sheet into the hot oven. Bake for 30-35 minutes undisturbed. You’ll hear sizzling as fat renders and skin crisps. The tops should turn deep golden.
Avoid opening the oven door early to maintain temperature. Rotate the sheet halfway if your oven has hot spots. This side gets the initial blast for superior crunch.
Step 8: Flip and Second Bake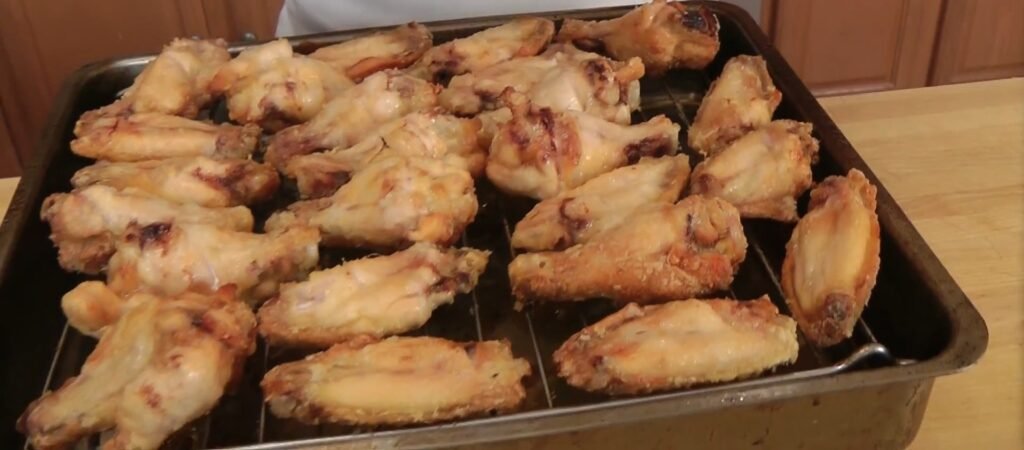
Remove the sheet carefully. Flip each wing using tongs, exposing the underside. Drizzle a bit more olive oil on this side, just enough to shine.
Return to 450°F oven for another 25-30 minutes. Watch for even golden color on both sides. Total bake time crisps fully without smoke, thanks to the dry start.
Test doneness: skin crackles when tapped, meat pulls from bone easily. Internal temp should hit 165°F if checking. Rest briefly on rack.
Step 9: Sauce and Serve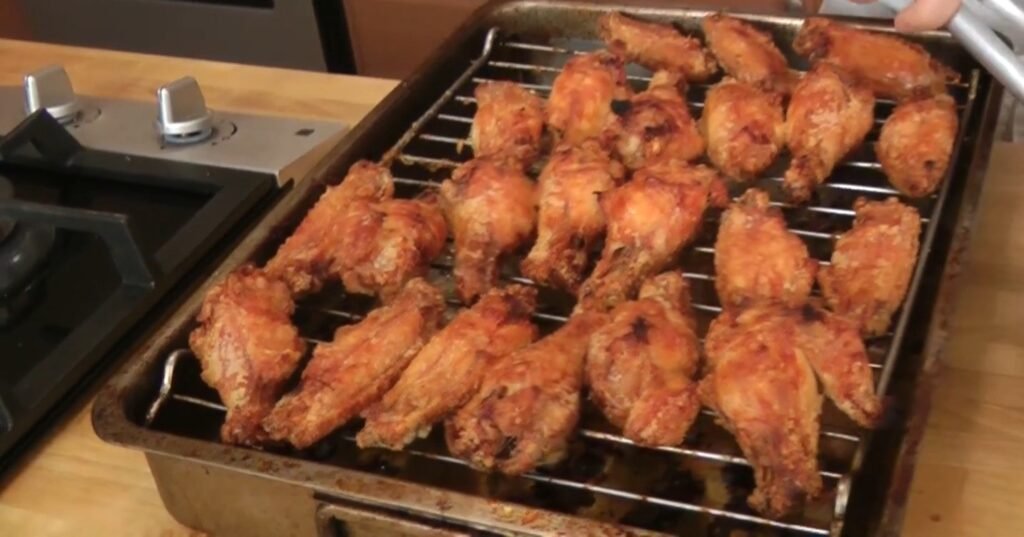
Toss hot wings in your favorite hot sauce until coated. Use a large bowl for this. Hot sauce adds tangy heat that clings to the crisp exterior.
Plate immediately with ranch or bleu cheese on side for dipping. Garnish with celery sticks if desired. Serve hot for peak crunch.
- Prep Time: 15
- Cook Time: 1 hr