Ingredients
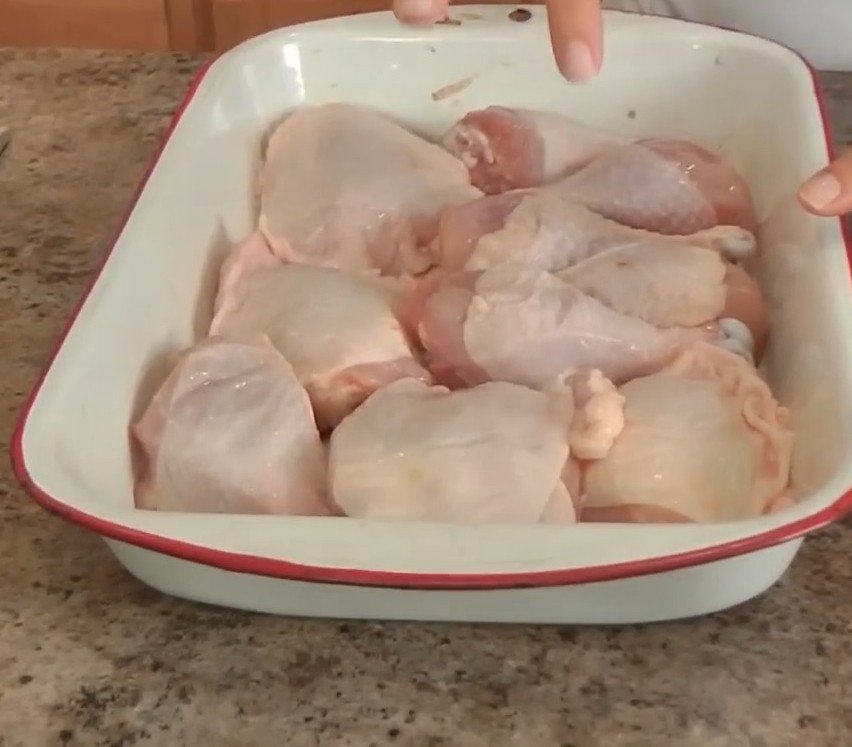
- 2-1/2 lb of Bone-in Chicken Breasts and Thighs, mixture of the two
- 2 Tbsp of Salt Free Steak Seasoning
- Salt, to taste
- Drizzle of Olive Oil
- 1 Cup of your favorite BBQ Sauce
Instructions
Start by setting your oven to 400 degrees Fahrenheit to ensure even cooking for the bone-in chicken pieces. Select a large roasting pan or baking dish that can comfortably hold all 2-1/2 pounds of chicken breasts and thighs without overcrowding too much, as this allows heat to circulate properly. Line the pan with foil if desired for easier cleanup, though it is optional since the chicken skin will release some fat during baking.
2. Season the Chicken
Pat the chicken dry with paper towels to help the seasoning adhere better and promote crispier skin later on the grill. Arrange the chicken pieces skin-side up in the roasting pan, ensuring they are in a single layer for uniform cooking. Drizzle a light amount of olive oil over the chicken, using just enough to coat lightly, about 1-2 tablespoons total, to enhance flavor and prevent drying out.
3. Apply Seasonings GenerouslySprinkle 2 tablespoons of salt-free steak seasoning evenly over the chicken, rubbing it into the skin and exposed meat for deep flavor penetration; this blend typically includes coriander, peppercorns, granulated garlic, and onion for a spicy, savory profile that pairs perfectly with sweet BBQ sauce. Add salt to taste, starting with about 1 teaspoon and adjusting based on preference, since the steak seasoning lacks salt. Massage everything gently to ensure full coverage, avoiding excess that could make the exterior too salty after grilling.
4. Oven Roast for Safety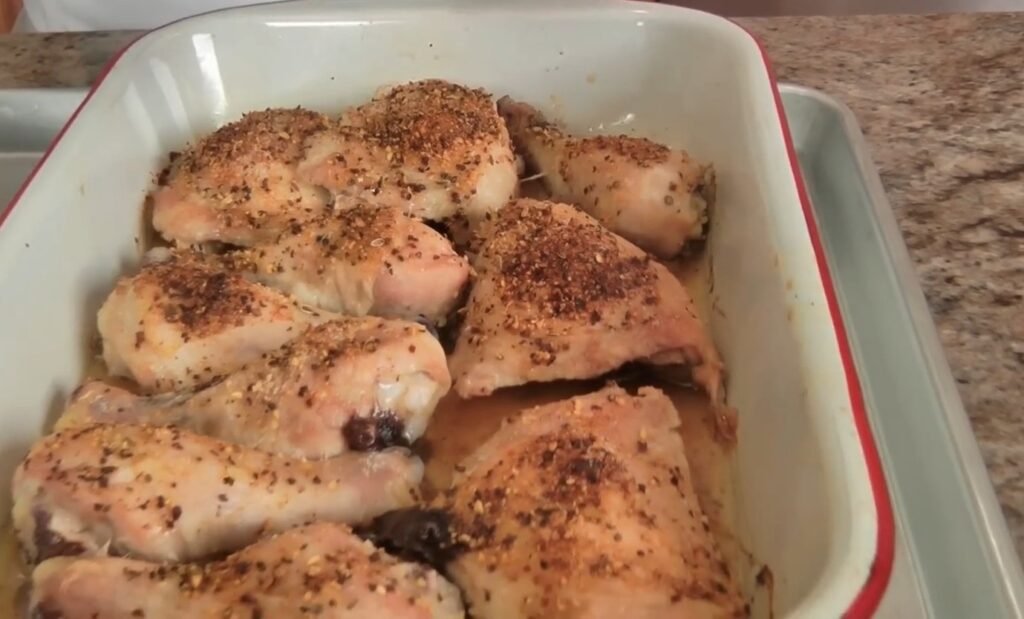
Place the pan on the top rack of the preheated oven and roast for 30-35 minutes, or until the chicken reaches an internal temperature of 165 degrees Fahrenheit in the thickest parts; use a meat thermometer for accuracy to guarantee food safety with bone-in cuts. The oven precook ensures the inside is fully done without charring the outside prematurely on the grill, especially important for larger pieces like thighs and breasts. Rotate the pan halfway through if your oven has hot spots for even browning.
5. Preheat the GrillWhile the chicken roasts, fire up your outdoor grill, whether gas or charcoal, to high heat or medium-high, aiming for a hot surface around 450-500 degrees Fahrenheit to create those signature grill marks and caramelization. Clean and oil the grates well to prevent sticking, as the chicken skin can adhere otherwise during flipping. Position one side for direct heat where you’ll place the chicken, and if possible, have an indirect zone ready, though the oven step minimizes the need.
6. Transfer Chicken to Grill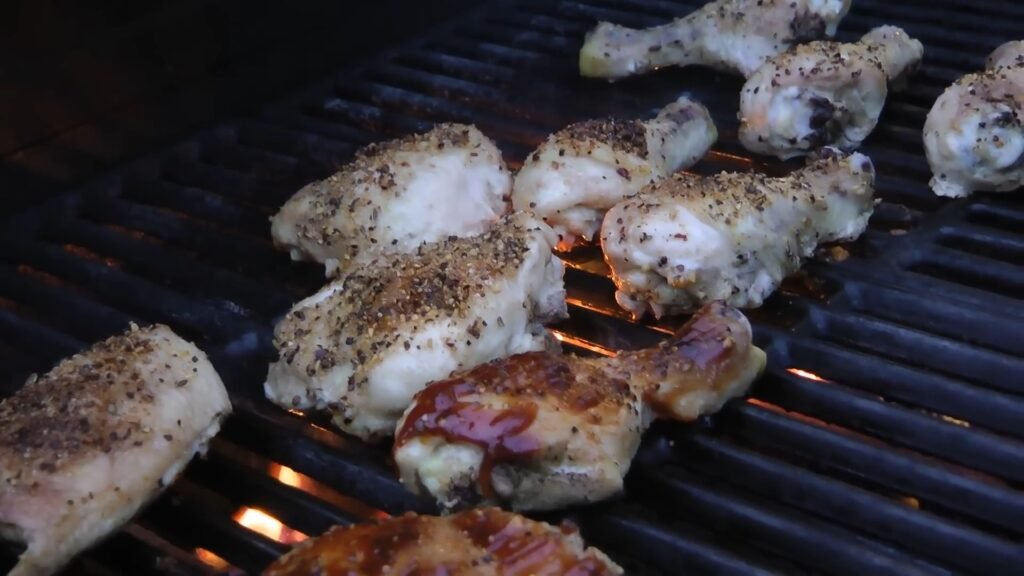
Remove the chicken from the oven and let it rest for 2-3 minutes; discard any accumulated juices in the pan or reserve for basting if desired, but note the chicken is now fully cooked inside. Using tongs, place the chicken pieces directly on the hot grill grates, starting skin-side up to build char gradually. Close the lid briefly to trap heat and start rendering the fat for crispiness.
7. Initial BBQ Sauce Brush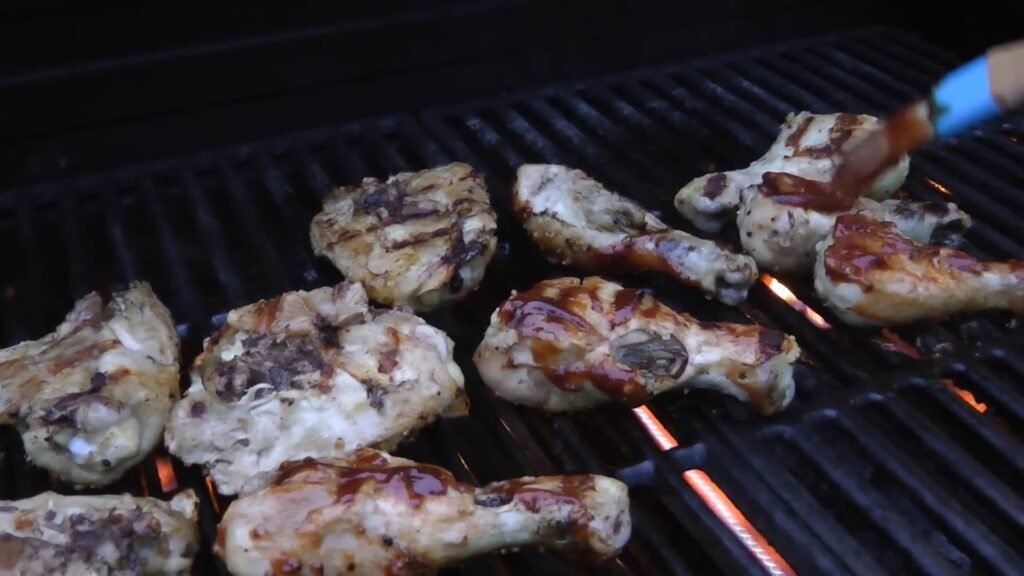
Have 1 cup of your favorite BBQ sauce ready in a bowl; reserve about 1/4 cup for final glazing and serving. Brush a thin layer of sauce generously over the top (skin side) of each piece, allowing it to start caramelizing from the sugars in the sauce. Grill for 30-60 seconds without flipping yet, watching closely as the high heat will quickly bubble and set the sauce.
8. Flip and Layer SauceFlip the chicken to the underside (bone side) using long tongs to avoid piercing the meat, and immediately brush more BBQ sauce on the newly exposed skin side. Continue grilling for another 30-60 seconds per side, flipping and re-brushing 2-3 times total to build 3 thin layers per side; this creates a thick, lacquered crust without burning, as excess time on sugary sauce leads to bitterness. Keep the grill lid open during this phase for control.
9. Final Glaze and RestFor the last brush before removing, apply a liberal coat of reserved BBQ sauce to all sides while on the grill, letting it set for 30 seconds. Transfer the chicken to a clean platter and tent loosely with foil for 5 minutes to redistribute juices, enhancing tenderness. Serve extra sauce on the side for dipping, ensuring no cross-contamination since the chicken is fully cooked.
10. Serve and Enjoy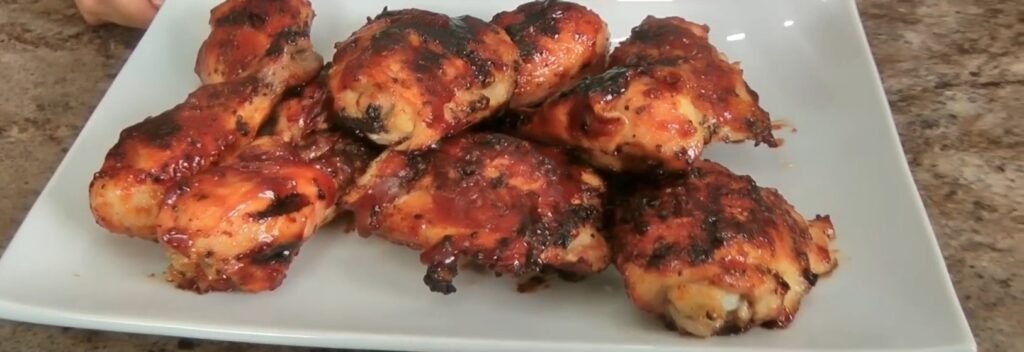
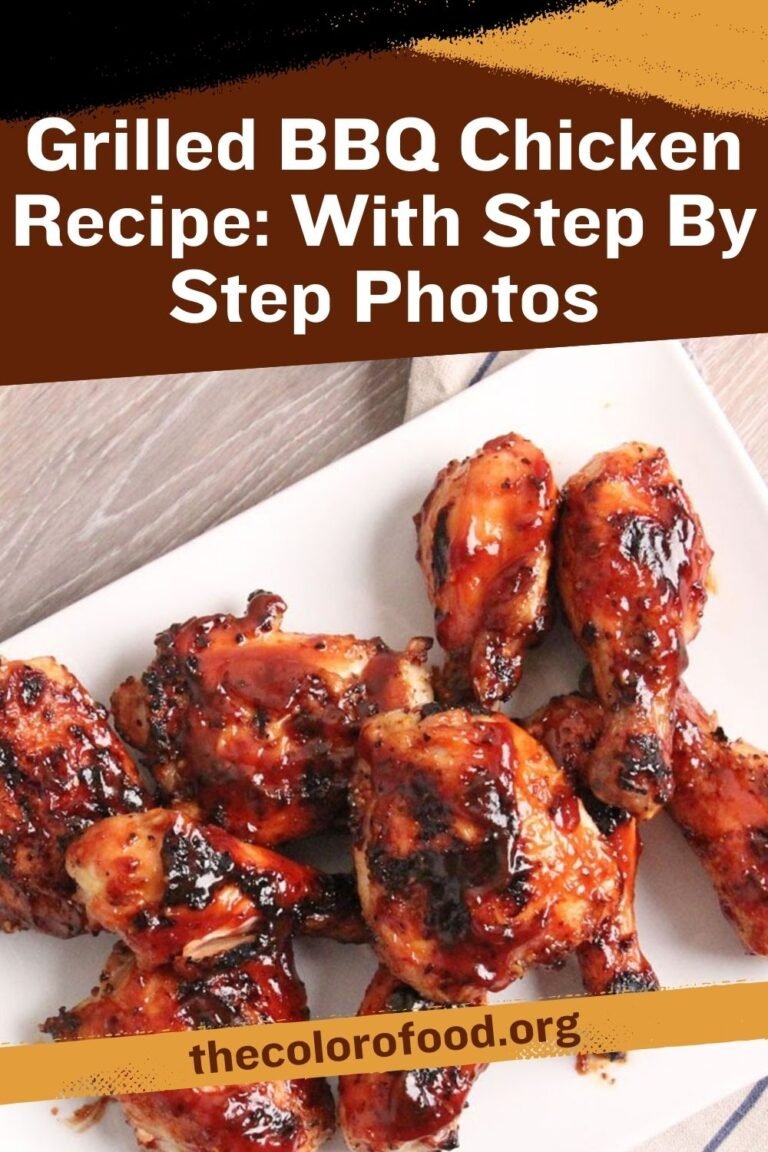
Slice into the chicken to reveal juicy meat pulling easily from the bone, with a smoky, caramelized exterior from the grill and sauce. Pair immediately for best texture, as the coating firms up upon cooling. This method yields perfectly balanced BBQ chicken every time.
- Prep Time: 10 Mins
- Cook Time: 45 Mins